 Commando
 Death’s Knell
 Raven
Raven Spider
 Hunchback
 Blackjack
 Centurion
 Yen-Lo-Wang
 Cataphract
 Ilya Muromets
 Jagermech
 Firebrand
 Quickdraw
 Atlas
Atlas Awesome
 Pretty Baby
 Battlemaster
 Highlander
 Stalker
 Misery
 Ballistic Weapons
 Lasers and PPCs
 Short Range Missiles
 Long Range Missiles
-
Do You Play other Games, too?
1 Aug 2014
-
The Best Shadowhawk 2D2 Brawler
13 Nov 2013
-
Competetive Spider 5D Build
7 Nov 2013
-
Shadowhawk 2H (P) Damage Dealer
23 Oct 2013
uac5 tagged posts
UltraAC/5 No-Jam Macro Tool Guide for Mechwarrior Online
Of all the weapons in Mechwarrior Online, only the UltraAC/5 have the unique mechanic of random jamming. Whenever you hold down the firing button or double click, the UAC/5 will release two shots resulting in double damage bursts. However, with a 20% chance, it will jam, rendering the weapon useless for 5 seconds.
Holding down the button (aka allowing double-shots and jamming) is actually a decrease in average damage per second (about 25% lower). But (very big but) if you are only fighting for less than 5 seconds, the potential burst and DPS is much higher.
Another advantage, besides increased sustained damage per second, is ammo conservation and reliability. Both excellent things to have on a weapon whose ammo is very heavy and has a random built-in jamming mechanic. The Ultra AC/5 is now much closer to the AC/5 in almost every respect. The additional ton and slot just buy you the ability to potentially burst. Especially your first shot becomes more powerful. This is useful for sniping, but the difference between the two weapons is not as big as it used to be.
If you don’t want your UltraAC/5s to jam, you have to restrain your trigger finger and only click precisely every 1.5 seconds. With a little practice, this is possible. However, there are also macros and tools which can help you with that. The remainder of this guide will show you where to get such a macro and how to set it up.
Macro Tool Installation and Setup
For this UltraAC/5 jamming macro guide we’ll be using ADHD – Fire Control by Clive (pilot name: evilC). It is a small tool which is already partially preconfigured for Mechwarrior Online. Check out his official page here and drop him a like. After all, he is providing free software for you. The tool is not that hard to set up, but if you are lazy or can’t get it to work, check out these few simple steps to get it all working.
1) Download the tool
Download the tool from his official site (direct link).
2) Unpack the zip file to a folder
Move it somewhere on your hard drive and create a desktop shortcut (right-click on the .exe-file and select Send to Desktop).
3) Start the program
Confirm any dialogues.
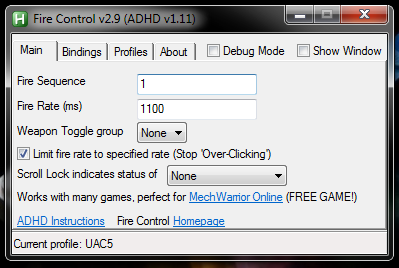
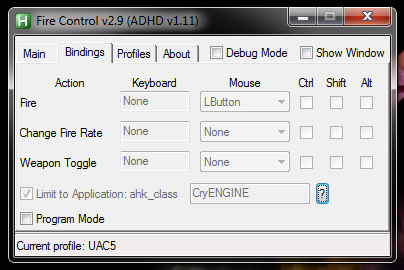
4) On the main-tab set the options as indicated in the screenshot
- Enter the weapon group containing all of your UltraAC/5s under Fire Sequence.
- Enter Fire Rate: 1500. If you have unlocked the Fast Fire efficiency, experiment with values around 1350.
- Side notes: You may need to add 4-5 to these values to account for lag. Keep in mind that the efficiency does not work while running Testing Grounds!
- Tick Limit Fire Rate.
- Ensure Weapon Toggle is set to None.
5) Set up bindings on the bindings-tab
- Tick Program Mode to be able to change settings.
- I would recommend setting all you UltraAC/5s to weapon group 1 in-game and then setting the Fire action to left mouse button (LButton).
- Ensure that Limit to Application is enabled and set to CryENGINE. This way, this tool will only work while Mechwarrior Online is running.
- Important: Untick Program Mode once you are done.
6) Own face!
If you have done everything right, you should be able to hold-down your mouse button and fire all your Ultra/AC5s without them ever jamming. You must have the tool running in order to work. Be careful if you are changing to a Mech which has something different set to its first weapon group. You might have to close the program (or set up an empty profile in Fire Control) to not mess with your ability to fire properly.
With Fire Control running, you can still click again to trigger the double-shot. If you are simply holding down the button, the macro tool will ensure that your weapons will not jam.
Credits
This tool was made by Clive aka evilC. If you like what you see here, go check out his official page and official forums thread and drop him a like or comment. The tool is free to use for every pilot, however, if you want to make a donation you can do so on his project page (side note: I do not know evilC personally and I don’t get any money from him).
Fire Control can handle many more things and has a lot more features which are not covered here. This guide is just meant to provide a quick-start into single-firing UltraAC/5s without any extra stuff messing up the guide. Check the project’s page or the official forums thread for more information on how to setup a TAG toggle button, work with chain-fire groups, change fire rate with the press of a button, and many more.
Get Connected!
If you know of an excellent build, resource, or guide, submit it and maybe it will be featured on mwo-builds.net and seen by thousands of players. You can submit builds by sending us an e-mail, post it in the official looking-for-builds thread, or send us a private message via the official forums. You can also submit guides and builds via Facebook or Twitter (see below). Join hundreds of other Mechwarrior enthusiasts and like us on Facebook and follow us on Twitter. Receive the latest guides and the best MWO builds directly to your favourite social platform!| Follow @mwobuildsnet |
People who read this guide also read:

![]()
One of the most viewed build on this blog is the Atlas D-DC all-round brawler build by Strawberry5. He and myself have played this build countless times and have proven its worth in PUG games. Mechwarrior Online has evolved since then, and strategies have changed. This Atlas brawler build has been adjusted slightly to better fit 2013 meta-game requirements. If you don’t like PPCs and want to look really good on the score board (damage dealt, kills, match score, etc) give this build a try. You will not be disappointed.
![]()
If you need AMS in this Atlas build, try swapping it for the Beagle Active Probe. Do not remove ammunition in exchange for the AMS since it is already carrying the absolute minimum for extended fights.
In comparison to the old Atlas brawler build, the new version trades the AMS, ammunition and movement speed for range, a BAP and burst damage.
![]()
- Use the high max range of your double Ultra AC/5 to lay down suppressing fire and chip away at enemies during the first minutes of the match. Enemy LRM-boats and other long range builds will duck back behind cover, and potential future enemies will have their starting armor reduced.
- Fire your Ultra AC/5s by single clicking at all times (1.1sec). Restrain yourself from holding down the key as they will most likely jam very fast and your actual damage output will decline. Only gamble on your weapons not jamming when being faced with certain death.
- Keep in mind that your ECM will not protect you from LRM barrages while it is set to counter mode.
- Although you have a BAP, it might be useful to counter an enemy ECM at times. The default hotkey for switching ECM modes is J.
- If you are engaged in an all-out close quarters fight, do not overheat due to alpha striking all the time. It will mean certain death. Instead, refrain from using the lasers and keep using your missiles and ballistic weapons only.
![]()


Get Connected!
If you know of an excellent build, resource, or guide, submit it and maybe it will be featured on mwo-builds.net and seen by thousands of players. You can submit builds by sending us an e-mail, post it in the official looking-for-builds thread, or send us a private message via the official forums. You can also submit guides and builds via Facebook or Twitter (see below). Join hundreds of other Mechwarrior enthusiasts and like us on Facebook and follow us on Twitter. Receive the latest guides and the best MWO builds directly to your favourite social platform!| Follow @mwobuildsnet |
People who read this guide also read:


One of my best friends, Strawberry5, has great success with an Atlas Brawler build, almost always topping the scoreboard and blowing scrubs to bits and pieces. This guide is the result of hours of grinding and experimenting and represents the, in my opinion, currently best load-out if you want to go toe to toe with your foes as an Atlas pilot. Be sure to drop by his profile and leave him a thumbs-up (link at the end of the guide).
![]()
![]()
![]()
![]()
![]()
![]()
- Atlas AS7-D-DC
- Standard Engine 350
- Max armor on all torso partitions, reduce both legs to ~41 and both arms to ~52
![]()
- 2x UltraAC/5 (7x ammo)
- 2x Medium Laser
- 3x StreakSRM2 (3x ammo)
- 1x C.A.S.E. (3x SSRM2 ammo and 2x UAC/5 ammo in left torso)
- Anti-Missile System (1x ammo)
- Guardian ECM (place in right leg to avoid early destruction)
![]()
- Always move at max speed (>62kph with upgrades) if possible. This will make your worst enemies (SRM6s, AC/20s, Gauss Rifles) miss your mech more often.
- Use the high max range of your double UltraAC/5 to lay down suppressing fire and chip away at enemies during the first minutes of the match. Enemy LRM-boats and other long range builds will duck back behind cover and potential future enemies will have their starting armor reduced.
- Always try to entangle your enemies in close quarters combat as soon as possible. You are one of the most fearsome brawlers on the battlefield; make your enemies brawl as well whether they want to or not.
- Fire your UltraAC/5s by single clicking at all times (1.1sec). Restrain yourself from holding down the key as they will most likely jam very fast and your actual damage output will decline. Only gamble on your weapons not jamming when being faced with certain death.
- If your ECM gets blocked (mostly by light mechs), switch to counter (hotkey J). Afterwards, find the ECM bearing mech and dispose of it with your triple SSRM2s and lasers.
- Keep in mind that your ECM will not protect you from LRM barrages while it is set to counter mode.

![]()
People who read this guide also read:

Please note: This guide may still be viable, but is very old.
You will probably find better ones or will need to tweak a few things. In addition, some or all meta game information and play style/hints may include outdated information. As soon as an updated version is available, it will be shown here. If you have up-to-date information on how to improve this build, please leave a comment below. Thank you.
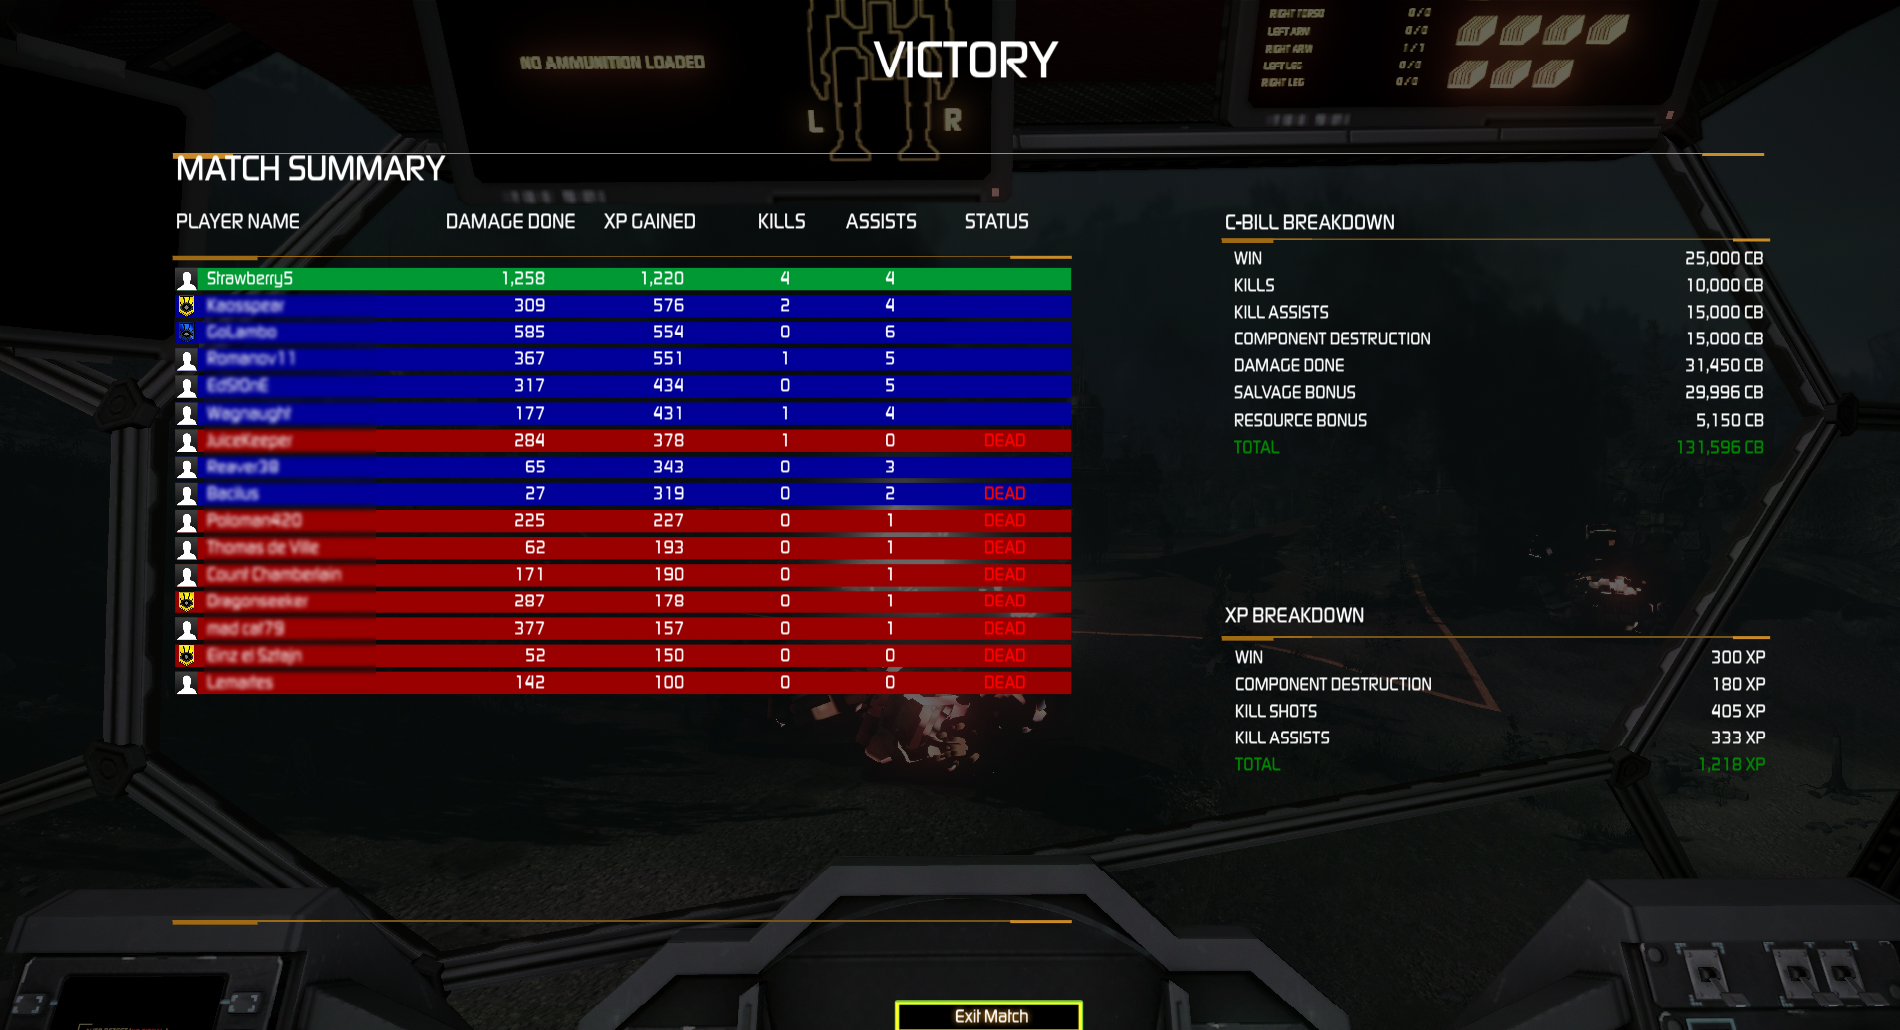
I am happy to provide you with a final guide for the regular Cataphract variants. A guy named Wrench from the official forums was kind enough to allow me to use the guide here. Be sure to check out his profile and the original thread in the official forums to drop him a like and thumbs up. Enjoy:
![]()

The Cataphract has been a staple of House Davion Lances since it’s construction. A dependable heavy mech that could be relied upon, and The Gershom, a -3D variant piloted by loyalist Nicholas Reffin was no exception. With a pair of fearsome AC10s, four medium lasers and an experimental XL290 engine, The Gershom was a classic design that saw it’s share of battles and always comported itself well on the field, bringing victory and honour to its pilot .But a mechwarrior is never completely satisfied.
While The Gershom was successful, Nicholas was always irritated by its limitations. The mech shouldered the vulnerability of the XL engine, but still moved at a mediocre speed. This sluggishness made close range confrontations unpleasant when the fighting moved in, especially against highly manoeuvrable mechs. This was only compounded by the mech’s inability to quickly dissipate heat. Temperature ratings rested in acceptable tolerances when lobbing shells at range, perhaps with sporadic use of the MLAS. But frequent firing of all four MLAS in a brawl situation had a tendency to build an uncomfortable amount of heat.Still, with limited resources, it was hard to justify any changes on a successful – if imperfect – mech. The Gershom was ran as a powerful, but conventional heavy support unit for some time. But in a changing time of war, more flexibility is desired from a heavy chassis. Flush with an unexpected source of income, Reffin demanded a complete overhaul of some of his older configurations from his engineering team. First among these refits was a project to expand the tactical flexibility of the Gershom.
After much deliberation and several rejected designs, the Gershom was completely striped and rebuilt over a matter of weeks. While unpopular with some, the decision was made to actually reduce the armament on the mech, replacing the dual AC10s with a pair of UAC5s. The argument was made that despite the drop in single shot punch, the rapid firing rate of the combined UAC5s, provided it was properly managed, could bring the total destructive power of the cannons to near parity with the AC10s; and in some use-cases actually exceed them. This fire power could be maintain while projecting a more suppressive effect on the battlefield, laying down a threatening barrage of shells rather than the sporadic hammering of the AC10s. This was though to be more in line with the Gershom’s expanded role as a more active direct fire support unit.
The lighter and more space efficient cannons made way for the upgraded XL320 engine. Capable of moving the large Cataphract at the more impressive speed of 74kph, the engine was further augmented by an additional heatsink over the old design, helping to alleviate what minor heat issues the Gershom had without losing any of the four medium lasers.
However, the most extensive augmentation to the mech’s design was the rebuilding of the internal structural using the new weight efficient Endo-Steel technology and addition of 4 class-III jump jets. While bulky, the new lighter frame brought the mech just in line with the proper tonnage to thrust ratio needed to make the jets worth while.
While the Gershom will never exactly soar over the battlefield, the jump jets give the mech a decent amount of vertical and horizontal movement. This aerial mobility combined with the mech’s higher top speed allow for a much greater range of tactical options. Whether using the jets to reach a high vantage point to fire a storm of UAC5 rounds down on an enemy, to escape an unfavourable engagement, or to short-cut and overtake a fleeing enemy, the jump-jets are a constant surprise to the Gershom’s foes in the field.
The Gershom’s remaining limitations mostly centre around it’s shallow ammunition stores, 100 UAC5 rounds can be used up quickly in an engagement of even moderate length. The XL engine is a constant source of vexation and due concern in the broad chested Cataphract, requiring constant awareness of the mech’s torso condition.
![]()
![]()
![]()
![]()
![]()
![]()
- Cataphract CTF-3D
- XL Engine 320
- Maxed Armor
![]()
- 2x UltraAC/5 (4x ammo, best placed in legs)
- 4x Medium Laser
- 4x Jumpjets
![]()
![]()
People who read this guide also read:
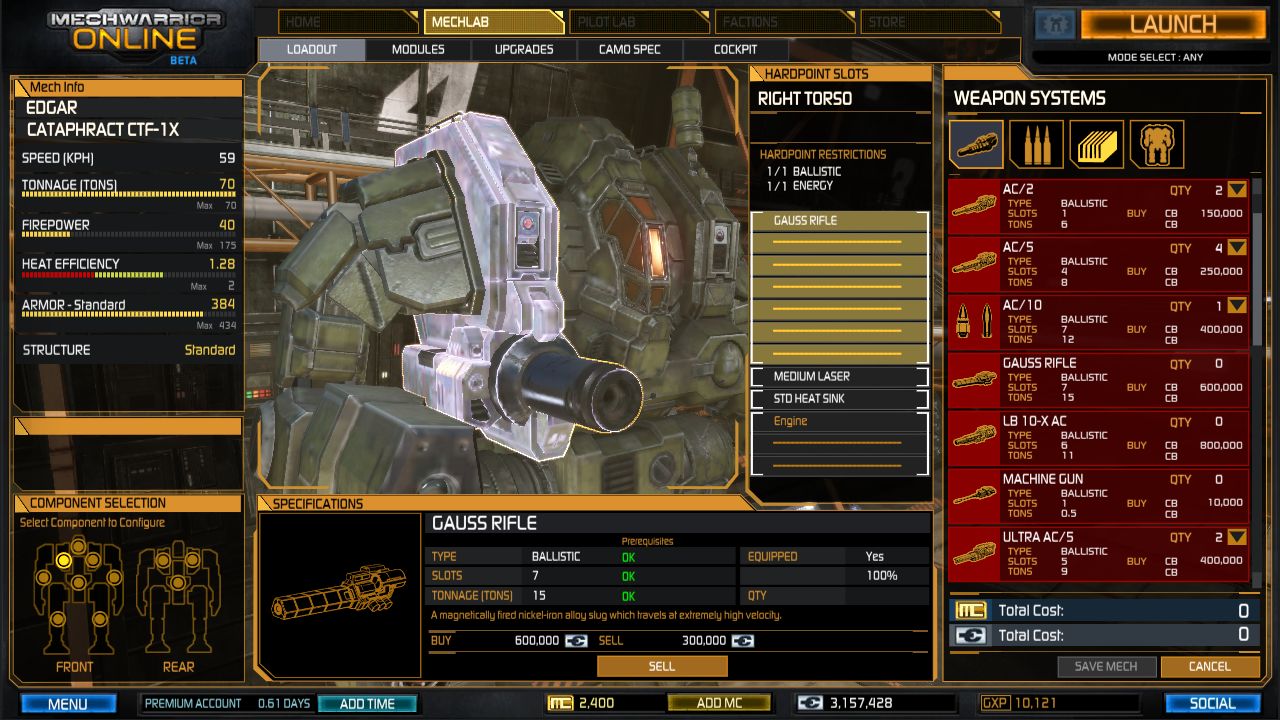
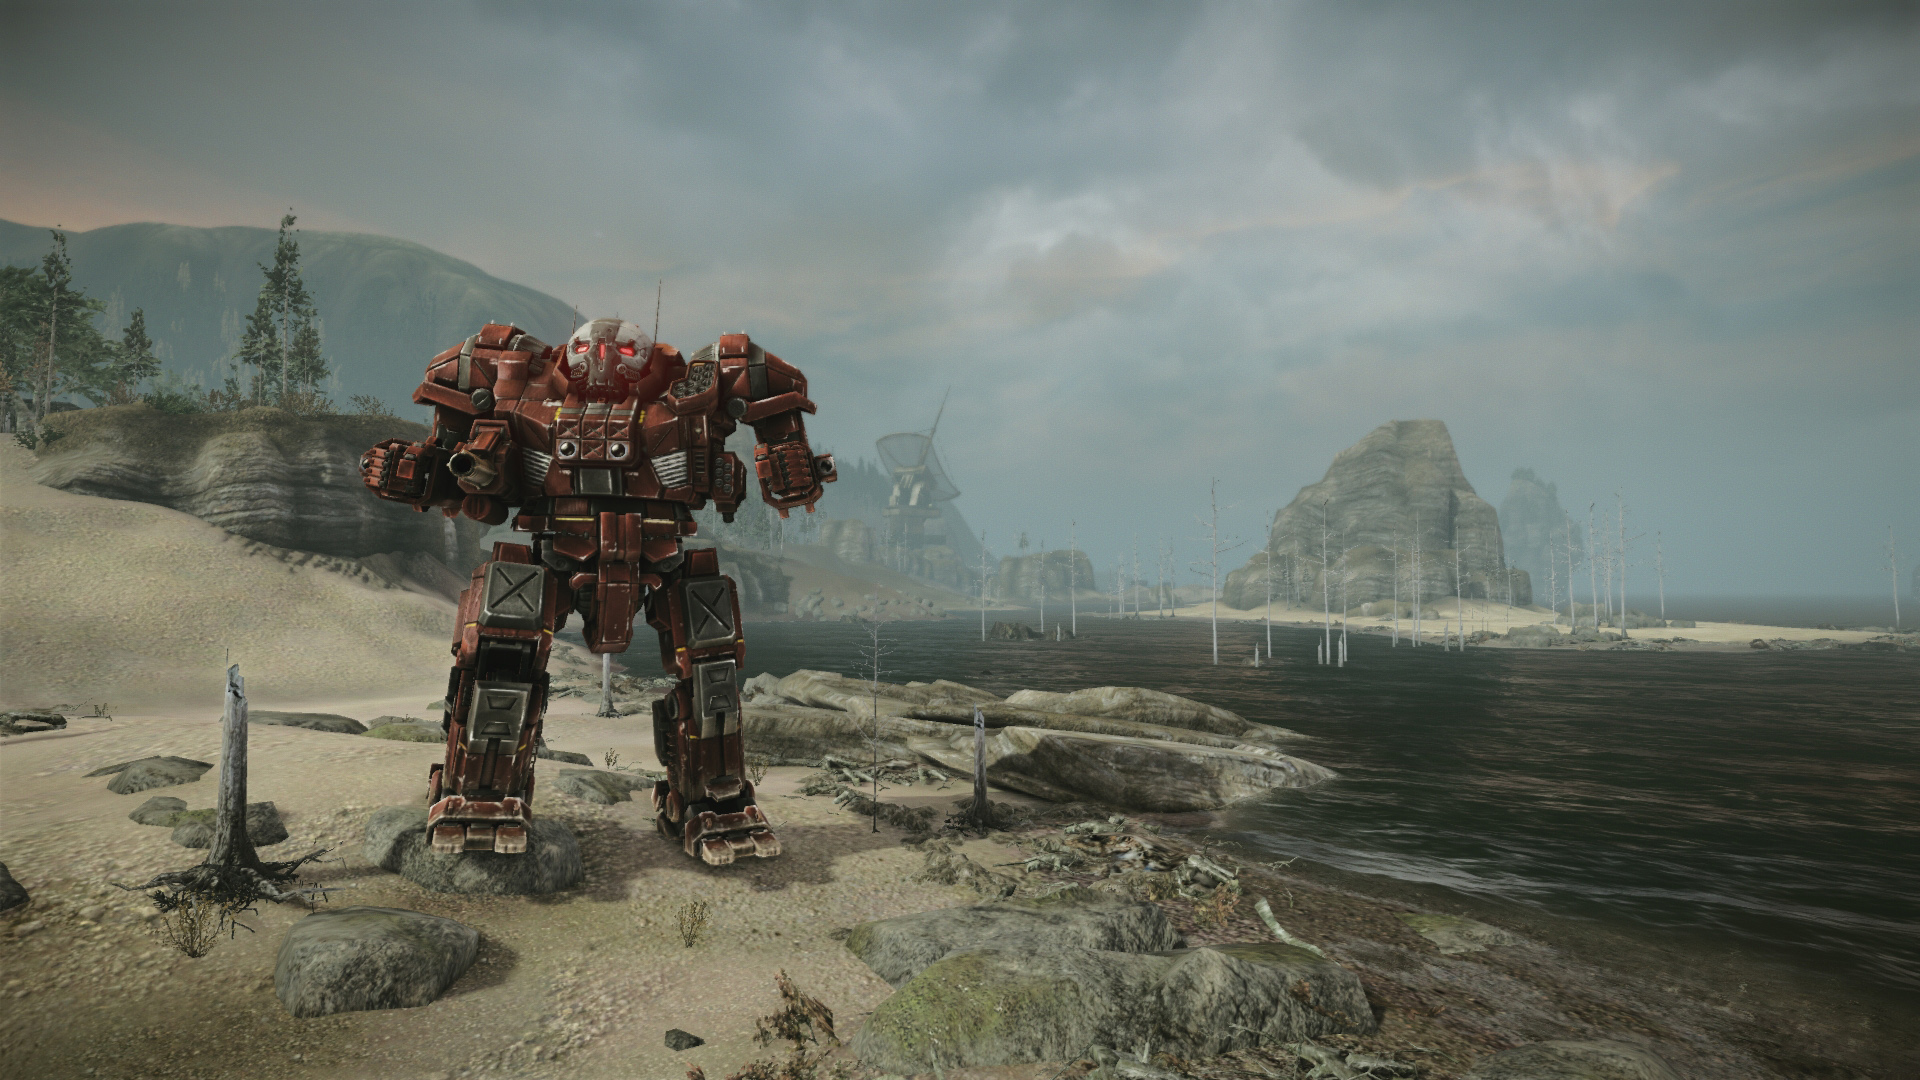
This build provides a short description of a nice CTF-2X brawler build with relatively high damage output (whooping 50 alpha strike) while still maintaining a very nice heat efficiency to fight for extended periods of time. Long range combat is not recommended but you will still be able to harass over long distances with an Ultra AC/5.
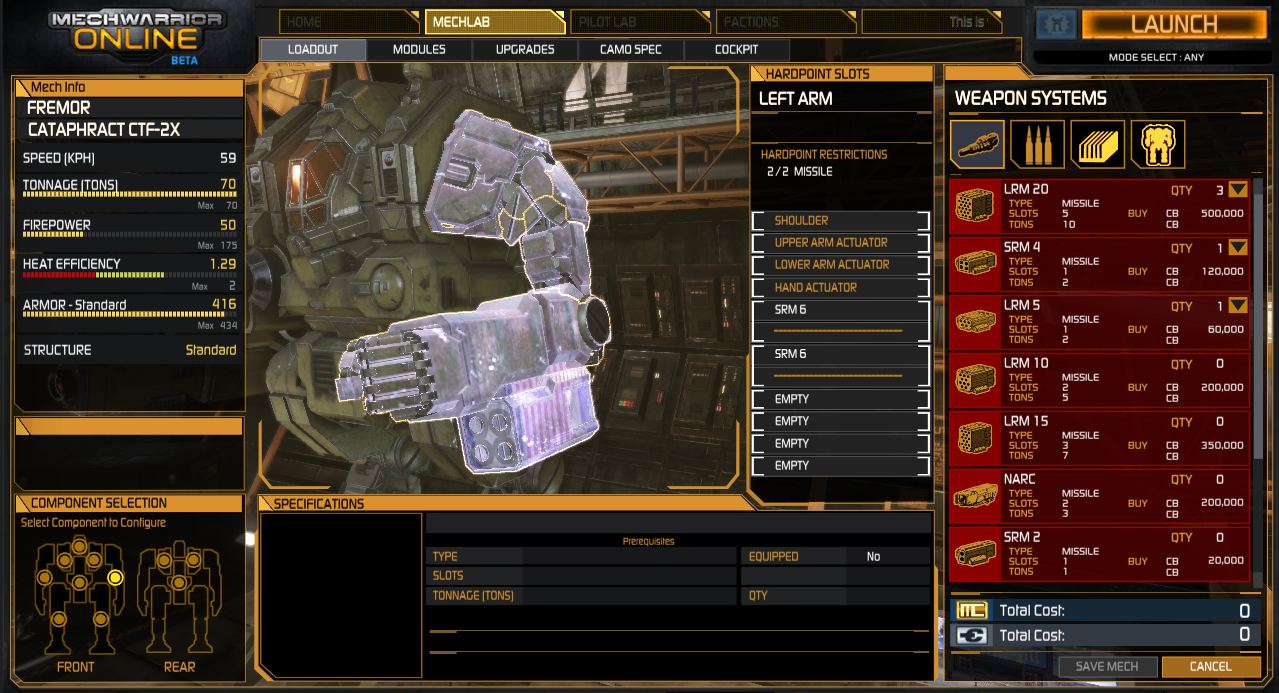
CTF-2X SRM6 Brawler
![]()
![]()
![]()
![]()
![]()
![]()
- Cataphract CTF-2X
- XL Engine 255
- Max Armor except legs (~51 each)
![]()
- 3x Medium Laser
- 1x Ultra AC/5 (~2x ammo)
- 2x SRM 6 (~3x ammo)
- 1x Anti-Missile-System (1x ammo)
![]()
- Despite being a heavy and having a considerable amount of armor: play save, do not lead the charge. Use the increased speed from the engine to outmaneuver your opponents.
- You will be an easy victim for LRM boats despite having an AMS and driving a heavy chassis. Try to avoid open spaces at all times.
- If you spot enemies at the horizon, use heat vision (hotkey H) and zoom (hotkey Z) and place some single UltraAC/5 hits. Most enemies will duck behind cover and cease to or not even open fire.
- If you are not proficient with SRMs, yet, set your SRM6s weapon group to chain fire (hotkey BACKSPACE) and fire single bursts. If you want to fire both missiles at the same time, double tap the weapon group´s hotkey.
- Remember that you can use your mouse cursor (yellow circle) to aim your SRM6s.
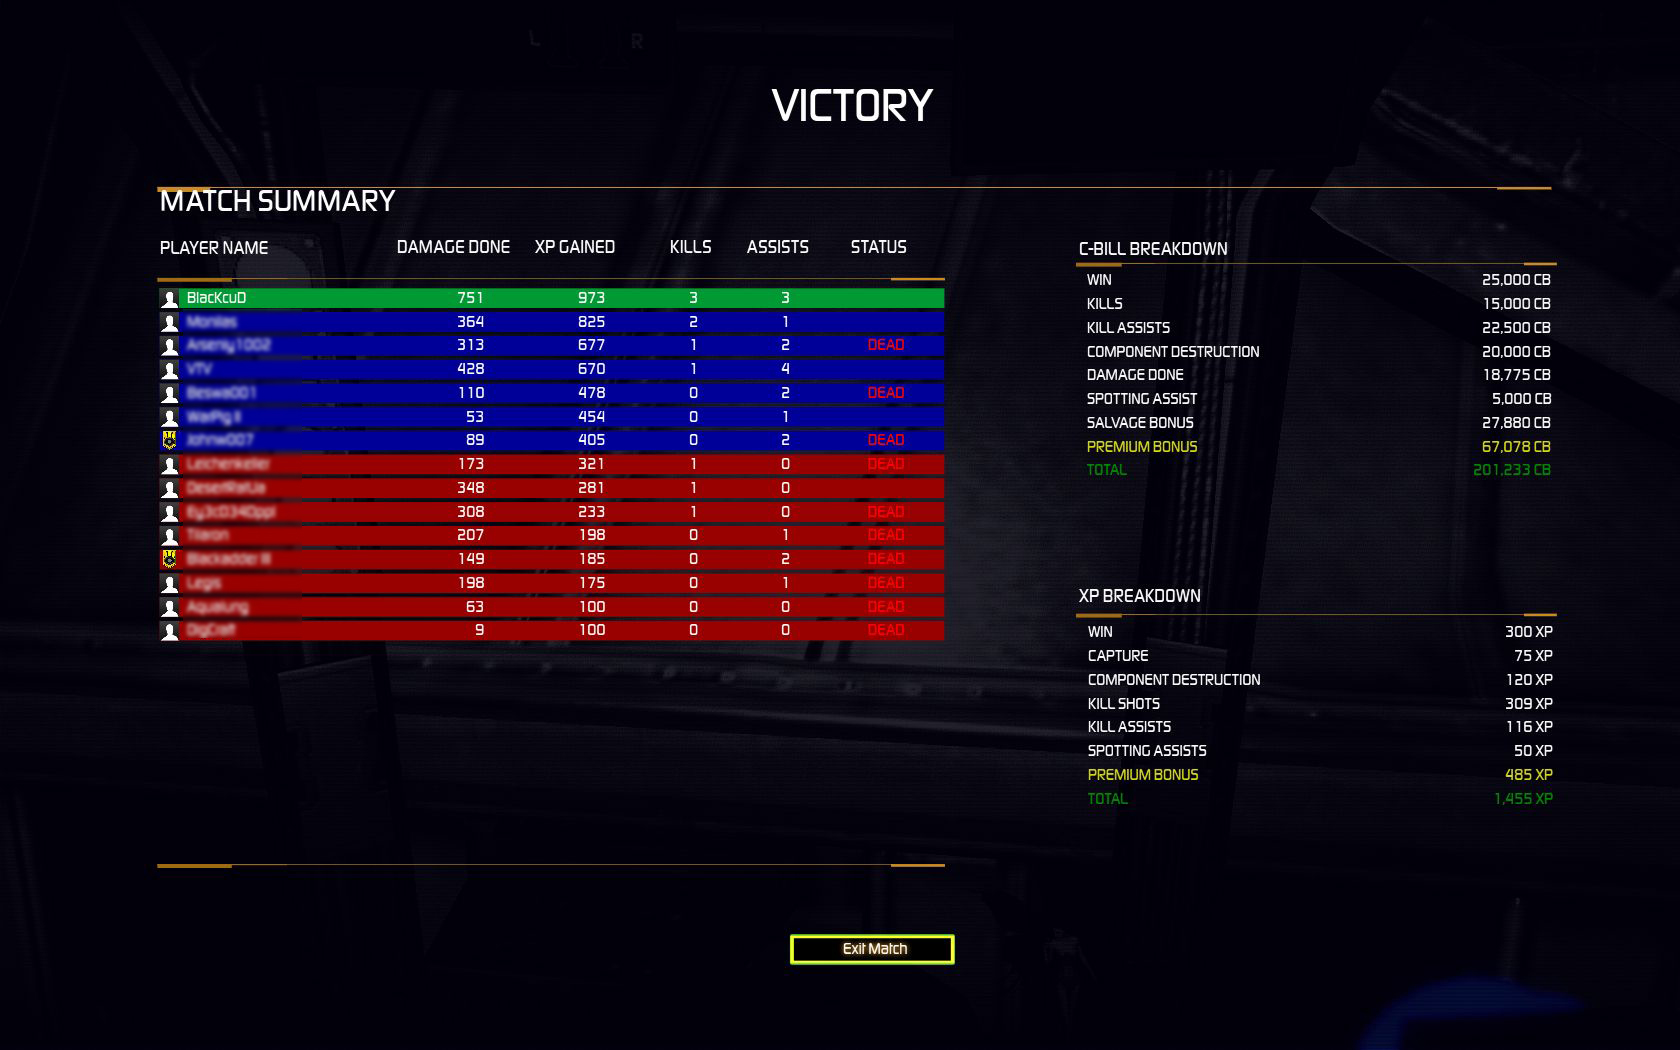
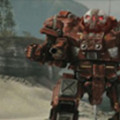
Average round as CTF-2X SRM6
![]()
Get Connected!