
Category Short Range Missiles (e.g. SSRM2)
Excellent Shadowhawk 2D2 Brawler Guide
![]()
It is now widely accepted (but not proven) that the Shadowhawk is the most versatile and viable of all the Project Phoenix Mechs. This build is another extremely good argument why this claims are probably true. A Shadowhawk 2D2 equipped with all the 270m range goodness (AC/20, Medium Lasers, StreakSRM2) will make you a fearsome brawler. Speed, firepower, agility, and armor are very nicely balanced making this an absolute bad boy on the battlefield. Smegmw from HBA is one of the first to come up with this build and many have copied it since. I have started to use it myself, and although I am a sh1tty Medium pilot, I melt faces with this thing, doing 400-600 damage without any basic upgrades. If you have ordered a Project Phoenix package which includes the Shadowhawk, I definitely recommend checking this build out. It is also very cheap to build c-bill wise.
The armor distribution on the Smurfy link is close to optimal. Depending on your play style you might want to shift a few armor points from the legs to the arms. However, this won’t probably make too much of a difference. Also note that this build is very cheap c-bill wise. Assuming you have none of the parts you will only need 4.6M c-bills. You might want to add Artemis, as well, in order to improve StreakSRM2 lock-on times.
- Use your arms to absorb incoming fire if you can’t hide fast enough. If you lose one of your Medium Lasers, you are still more than fine.
- Your main damage is coming from your AC/20. Make sure every hit counts and avoid firing it over great distances. Shoulders aka side torsos of your enemies are prime targets.
- If you are running high on heat, stop firing your StreakSRM2s. If you are still on high heat, stop firing your Medium Lasers, as well. Focus solely on placing a couple good AC/20 hits.
- Do not fire while turning with your keyboard. Instead, adjust your Mech first, then use your mouse to place precise shots.
- Use your jump jets! They are not only for easier cliff climbing or poptarting. When engaging enemies, use them to look over small ledges and other obstacles which block your line of fire. You will most certainly get a couple of hits in before you are even there.
- Always soften your falls with Jump Jets in order to avoid unneccessary damage to your legs. Some of your most important components are in your legs.
Get Connected!
If you know of an excellent build, resource, or guide, submit it and maybe it will be featured on mwo-builds.net and seen by thousands of players. You can submit builds by sending us an e-mail, post it in the official looking-for-builds thread, or send us a private message via the official forums. You can also submit guides and builds via Facebook or Twitter (see below). Join hundreds of other Mechwarrior enthusiasts and like us on Facebook and follow us on Twitter. Receive the latest guides and the best MWO builds directly to your favourite social platform!| Follow @mwobuildsnet |
Read More
Shadowhawk 2H (Project Phoenix Hero Mech) Juggernaut/Brawler Build
![]()
It seems that, in terms of actual combat effectiveness, the Shadowhawk is pulling ahead of the other Project Phoenix Mechs. This might change over time, as more and more builds are being figured out. However, at the moment Shadowhawks are destroying PUG matches on a regular basis. The Shadowhawk is the Project Phoenix’s Medium Mech weighing 55 tons. It has multiple hardpoints for every weapon type making it a very versatile Mech. Add Jump Jets to the mix, and you got a deadly and agile ninja, pacing around the battlefield, dishing out sick damage numbers. The damage is usually so high that a skilled Shadowhawk pilot with the right build must not fear a comparison with other Heavy and Assault pilots! This post will provide you with a rough outline of an allrounder build for the Shadowhawk 2H, the Project Phoenix Hero Mech variant.
Pay close attention to the armor distribution and emulate it to the point. Once you have some experience with the build you might want to adjust a couple points to your liking, but this allocation is already very polished and prooved its worthiness in a lot of battles. If you don’t have the engine lying around, you can also make this build work using an XL-300 (drop one UltraAC/5 ammo and increase armor on legs and left arm).
![]()
- Use your right arm as a shield. If you have incoming damage (especially ballistics or missiles of any kind), turn your upper torso quickly. Your shield arm has no armor on it, but it will still reduce the incoming damage greatly.
- At the beginning of matches and during long range stand-offs, use your UltraAC/5 to harass over great distances. It will wear down your opponent and, more importantly, scare him into cover.
- Your ER Large Laser should be constantly firing. Whenever you see a target popping up somewhere: shoot it! This will amount to high damage numbers at the end of the round and is very easy to do.
- The ammo distribution in this load-out puts a clear emphasis on extended use of the UltraAC/5. If you find yourself running out of StreakSRM2 ammo multiple times, exchange one ton of ballistics ammo for a second ton of StreakSRM2 ammo.
- This build is not considered to be an effective brawler. If you are entangled in close quarter fights, move a bit further away. Do not stop, do not engage. Keep firing your ER Large Laser and StreakSRM2s and get the hell out. You can dish out insane amounts of damage, but you can not take a lot.
- Weapon grouping advice: 1) UltraAC/5 2) ER Large Laser 3) Both StreakSRM2s 4) All weapons (optional)
- For modules use any combination of the following (in order of usefulness for random public games): Adv Seismic Sensor, Adv Sensor Range, Cool Shot 9 by 9, Faster Target Info Gathering, Artillery Strike.
Get Connected!
If you know of an excellent build, resource, or guide, submit it and maybe it will be featured on mwo-builds.net and seen by thousands of players. You can submit builds by sending us an e-mail, post it in the official looking-for-builds thread, or send us a private message via the official forums. You can also submit guides and builds via Facebook or Twitter (see below). Join hundreds of other Mechwarrior enthusiasts and like us on Facebook and follow us on Twitter. Receive the latest guides and the best MWO builds directly to your favourite social platform!| Follow @mwobuildsnet |
Read More
Atlas RS/RS(C) Classic Brawler Mini-Guide
![]()
This is just a minimalistic guide to quickly present another guide which is based on a suggestion in the current MWO forum’s build guide thread. If you have an excellent build yourself, post it in there and we will have a look at it! We read through all guides and post the best ones here. This load-out was originally proposed by DiePrimateDie in said thread. It is an Atlas-RS-build with a heavy emphasis on close range damage. Since the AS7-RS and the AS7-RS(C) have the same hardpoints, you can use this load-out on both variants. An AC/20 and two SRM6s make you an excellent brawler. Add to this four Medium Lasers and enough ammo and heat sinks to fire all of this at a constant rate, you can deal a crap-ton of damage at 270m range. If it is within range, it is dead. You alpha strike will rip through enemy Assaults and Heavies in seconds.
This build works with the RS and the Champion Mech variant RS(C). If you prefer the D-DC, check out this similar Atlas D-DC brawler builds overview.
![]()
- This build is very heat efficient and carries a lot of ammo. Do not fear firing your weapons at all times. However, do not spam aimlessly. Especially the AC/20 hits should be targeted on critical parts of the enemy.
- If you encounter other heavy brawlers, focus fire their center torsos. Turn your upper body sideways, whenever you are not firing. You will be able to down an enemy Atlas without sustaining more than 20% armor.
- Move the larger chunk of your torso armor to the front parts. The stock distribution places too much emphasis on the rear. See the values in the Smurfy-link to get a rough idea of how these numbers should look like. Approximately 20 armor for the rear side torsos is enough. Center torso can even go as far as 100 upfront and 24 in the back.
- Weapon grouping advice: Weapon groups are completely up to you, but the following can serve as a field-proven starting point: 1) AC/20 2) All Medium Lasers 3) Both SRM6s 4) Alpha Strike aka all weapons you have (or bind alpha strike to a more accessible hotkey).
This build is based on a load-out proposed by DiePrimateDie in the official forums. Thanks again for that one.
Get Connected!
If you know of an excellent build, resource, or guide, submit it and maybe it will be featured on mwo-builds.net and seen by thousands of players. You can submit builds by sending us an e-mail, post it in the official looking-for-builds thread, or send us a private message via the official forums. You can also submit guides and builds via Facebook or Twitter (see below). Join hundreds of other Mechwarrior enthusiasts and like us on Facebook and follow us on Twitter. Receive the latest guides and the best MWO builds directly to your favourite social platform!| Follow @mwobuildsnet |
Read More
How to Build the most efficient Atlas D-DC SRM + AC/20 Brawler Loadouts
![]()
Everybody enjoys the Atlas D-DC. Everybody loves SRMs! Everybody craves for AC/20s. Everybody likes to have an ECM installed. Everybody wants to be on top of the score board. Well, maybe not everybody but most players will admit that most of these things are excellent toys to have fun with in Mechwarrior Online. I have a fair share of Atlas piloting experience myself and tried various builds. I also receive regular input from clan mates and real-life friends who pilot D-DCs themselves.
For a regular full guide, the author would rant on about how you must balance ammo position and tonnage. Armor on legs and engine size, etc etc. Not here. We played Atlas AS7-D-DCs for weeks and have come up with two of the most excellent builds. These builds are focussed on head-on close quarter combat. Long range weapons and PPCs are for sissies. Real pilots bring an AC/20 to the SRM brawl. 100t of death will ensure you eternal glory on the battlefield and the death curses of your enemies in the weeks to come.
![]()
We have come up with two very similar builds. The first one is faster, has more armor and an AMS installed. The second one skips on the defensive part in order to utilise bigger SRMs with more heat sinks. Thus, the second build runs a little bit slower and is more vulnerable, but has a slightly higher alpha strike and more sustained dps. Which of the two builds you’ll use is completely up to you. If you are a new to the game or the assault chassis in general, I personally recommend going with version #1. If you are already an experienced MWO player and know how to play, go with version #2.
Atlas D-DC Build version #1 – More Armor, better engine, and AMS
Atlas D-DC Build version #2 – Higher alpha strike, more sustained DPS.
If you want a more all-round build with more ranged weapons, but still stick with the D-DC and what makes it so strong, check out the Atlas D-DC juggernaut build guide.
![]()
- Your side-torsos are your most vulnerable part. You won’t die if you take some hits, but there is a high chance your most valuable weapons will be critted and destroyed. If you can not shoot, but are being shot at, turn your upper torso sideways. Your arms are sturdy as hell, and you won’t miss them once they are gone.
- If you are engaged in a brawl and running very hot, stop firing the medium lasers. Focus on perfectly hitting your AC/20 shots only. If the heat permits it, continue firing your SRMs.
- Weapon grouping tips: 1) AC/20 2) Medium Lasers 3) SRM6s 4) All weapons. This is one possible way to configure your weapon groups. However, do not bother with chain firing or other combinations. The loadout is pretty straight forward, and you should have these four intuitive groups set for maximum efficiency in hectic situations.
- Do not waste your SRM ammo on light Mechs. You will not hit them enough to make it worthwhile. Instead, use your medium lasers against their legs and fire AC/20 shots in their faces if you are sure you will hit them.
![]()
Get Connected!
If you know of an excellent build, resource, or guide, submit it and maybe it will be featured on mwo-builds.net and seen by thousands of players. You can submit builds by sending us an e-mail, post it in the official looking-for-builds thread, or send us a private message via the official forums. You can also submit guides and builds via Facebook or Twitter (see below). Join hundreds of other Mechwarrior enthusiasts and like us on Facebook and follow us on Twitter. Receive the latest guides and the best MWO builds directly to your favourite social platform!| Follow @mwobuildsnet |
Read More
Cataphract 2X Brawler Build
![]()
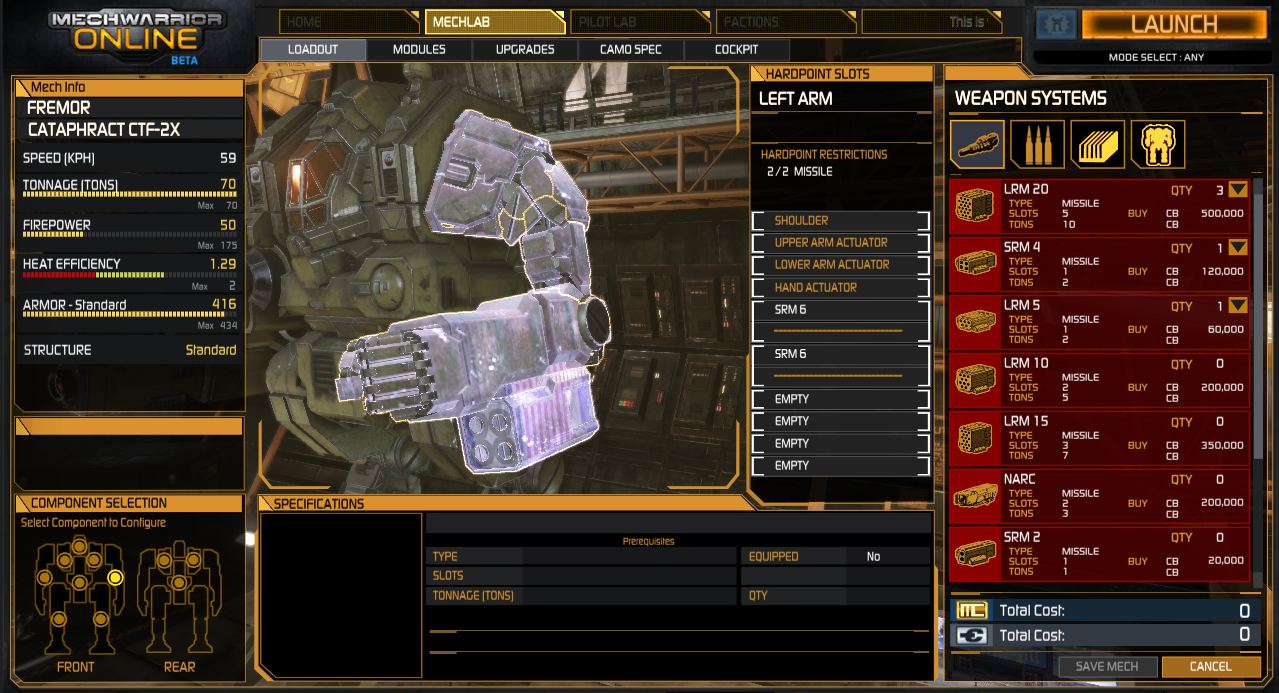
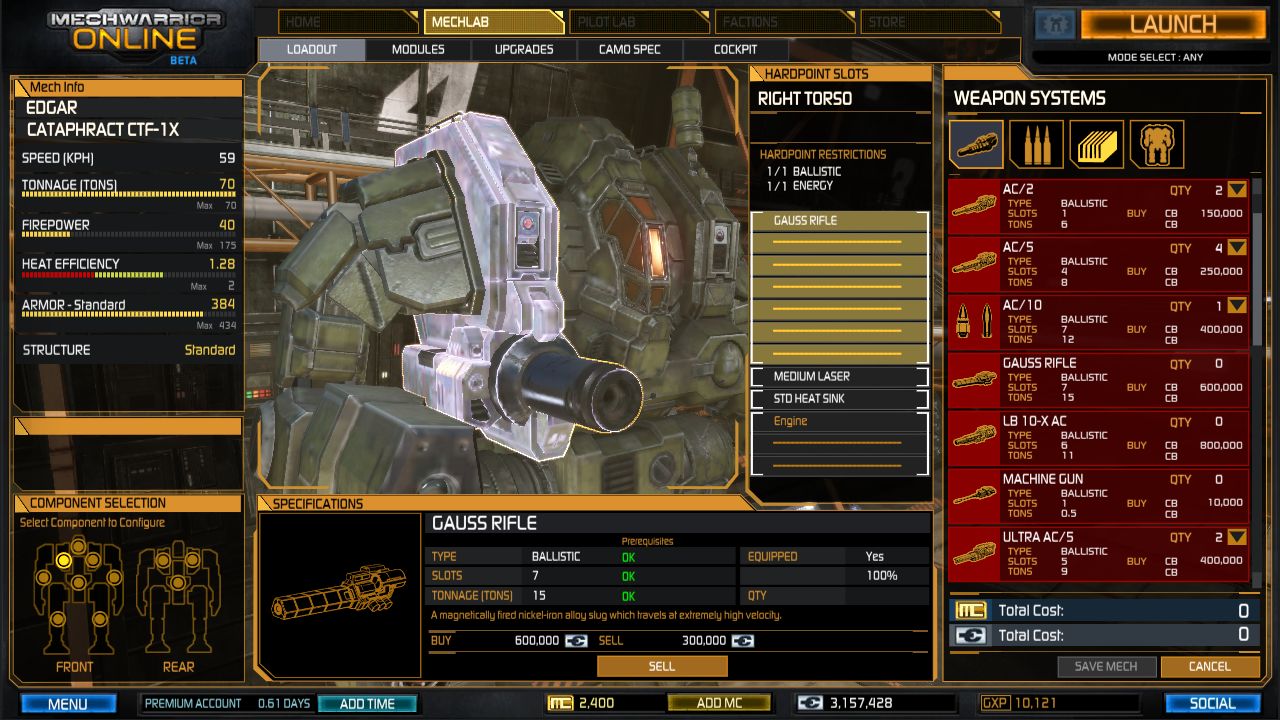
I am a great fan of the Cataphract chassis. I bought a 4X, 2X, and 1X right when they came out. However, the CTF-3D and the Hero Mech variant “Ilya Muromets” are much more popular. While those are really fun and powerful variants, I wanted to beat something with my 2X and 1X. So this guide came to life. See how a Cataphract 2X can easily deal as much damage as the more popular variants. People will only underestimate you until you blasted the second Assault Mech in their team to bits.
This build features everything you need. The Cataphract 2X brawler build is like the whole family fun package. A Gauss Rifle for long range shots and in order to add critical pinpoint damage while brawling. It can also be used in the rare case of running on high heat. Three Medium Lasers will serve as your all-purpose weapons. Finally, double SRM6 will be your melee range blaster. The recent MWO patch buffed their damage even further. Note, that all screenshots where taken before this patch and the damage values were already insanely high. Especially when encountering Assault Mechs, the SRM6s will provide the critical damage needed to take them down quickly.
![]()
- Although your Cataphract 2X is equipped with a Gauss Rifle, the most damage can be dealt at close range. Try to engage in brawls early on for maximum output.
- This build is very heat efficient. Do not fear to fire all weapons at all times. In the rare case of running on high heat, continue firing your SRM6s and the Gauss Rifle only.
- The combination of a Cataphract chassis and an XL-engine make you very susceptible to frontal attacks. Try to hug buildings, ledges, and cliffs at all times.
![]()
Note, that the following screenshots where taken before the recent buff to SRM damage. You should be able to easily reach or even surpass those numbers.
Get Connected!
If you know of an excellent build, resource, or guide, submit it and maybe it will be featured on mwo-builds.net and seen by thousands of players. You can submit builds by sending us an e-mail, post it in the official looking-for-builds thread, or send us a private message via the official forums. You can also submit guides and builds via Facebook or Twitter (see below). Join hundreds of other Mechwarrior enthusiasts and like us on Facebook and follow us on Twitter. Receive the latest guides and the best MWO builds directly to your favourite social platform!| Follow @mwobuildsnet |
Read More
![]()
One of the most viewed build on this blog is the Atlas D-DC all-round brawler build by Strawberry5. He and myself have played this build countless times and have proven its worth in PUG games. Mechwarrior Online has evolved since then, and strategies have changed. This Atlas brawler build has been adjusted slightly to better fit 2013 meta-game requirements. If you don’t like PPCs and want to look really good on the score board (damage dealt, kills, match score, etc) give this build a try. You will not be disappointed.
If you need AMS in this Atlas build, try swapping it for the Beagle Active Probe. Do not remove ammunition in exchange for the AMS since it is already carrying the absolute minimum for extended fights.
In comparison to the old Atlas brawler build, the new version trades the AMS, ammunition and movement speed for range, a BAP and burst damage.
![]()
- Use the high max range of your double Ultra AC/5 to lay down suppressing fire and chip away at enemies during the first minutes of the match. Enemy LRM-boats and other long range builds will duck back behind cover, and potential future enemies will have their starting armor reduced.
- Fire your Ultra AC/5s by single clicking at all times (1.1sec). Restrain yourself from holding down the key as they will most likely jam very fast and your actual damage output will decline. Only gamble on your weapons not jamming when being faced with certain death.
- Keep in mind that your ECM will not protect you from LRM barrages while it is set to counter mode.
- Although you have a BAP, it might be useful to counter an enemy ECM at times. The default hotkey for switching ECM modes is J.
- If you are engaged in an all-out close quarters fight, do not overheat due to alpha striking all the time. It will mean certain death. Instead, refrain from using the lasers and keep using your missiles and ballistic weapons only.
![]()
Get Connected!
If you know of an excellent build, resource, or guide, submit it and maybe it will be featured on mwo-builds.net and seen by thousands of players. You can submit builds by sending us an e-mail, post it in the official looking-for-builds thread, or send us a private message via the official forums. You can also submit guides and builds via Facebook or Twitter (see below). Join hundreds of other Mechwarrior enthusiasts and like us on Facebook and follow us on Twitter. Receive the latest guides and the best MWO builds directly to your favourite social platform!| Follow @mwobuildsnet |
Read More
Quickdraw Brawler Build
The Quickdraw is the latest addition to the heavy weight class. Its hit box is not the best, but it features jump jets and a lot of energy and missile hardpoints. This guide is just a quick overview on how to build a very good Quickdraw QKD-4H. Without further a due, let’s jump into one of the best Quickdraw builds for brawling. This bad-ass comes with three SRM6 and 4 medium lasers; a firepower comparably with two AC 20s. If you master the chassis this Mech will go up to 95 kph! There are only very few Mechs which can achieve this speed while maintaing that high a firepower.
This version does not have an AMS installed. However, with speeds of up to 95kph this Quickdraw build is easily able to dodge behind cover or sometimes even outrun missiles.
![]()
- Enable Arm-Lock in the options menu. Your weapons are spread over your whole chassis. It would be a shame if the shoots go everywhere as well.
- The cooling efficiency is very good. Just group all lasers to one group and all missiles to a second.
- When facing other heavies and assaults, shoot them right in the face and then use your superior movement speed and jump jets to get behind them. While they are wondering where you went, you will blast their backs with SRMs. If everything hits that’s a wooping 47 damage.
![]()
The core layout of this build is inspired by a thread originally posted by Warchanter. Click here to check out the original thread.
Get Connected!
If you know of an excellent build, resource, or guide, submit it and maybe it will be featured on mwo-builds.net and seen by thousands of players. You can submit builds by sending us an e-mail, post it in the official looking-for-builds thread, or send us a private message via the official forums. You can also submit guides and builds via Facebook or Twitter (see below). Join hundreds of other Mechwarrior enthusiasts and like us on Facebook and follow us on Twitter. Receive the latest guides and the best MWO builds directly to your favourite social platform!| Follow @mwobuildsnet |
Read More
![]()
I finally delved into the Stalker chassis and bought three of them (Misery, 3H and 3F). Let’s start with a Stalker 3H build. This build is an LRM-Boat but features excellent close-range defensive capabilities in the form of Medium Lasers and Streak SRMs. It also comes with a Beagle Active Probe and an Anti-Missile System. In my opinion, the Stalker 3H is one of the best Mechs to build an LRM-Boat.
![]()
- Stay behind your teammates to provide firing support.
- Always tag enemies, but do not expose yourself too long to enemy fire.
- Your optimal attack range is ~250m; at this range you can fire all your weapons at once.
- The minimum range for LRMs is 180m. If you are closer to your target they will do NO damage.
- Do not forget to open your missile bay doors at the beginning of each match. The lights at the border of your screen will switch from yellow to green when they are opened.
![]()
There is still no light Mech on this blog so let´s change it. Here comes one of the best Raven 3L builds. This Mech runs up to 150kph, has decent armament, has ECM and TAG equipped, full Ferro Fibrous armor and is heat efficient. Not possible? Well you are about to be wrong. Check out this guide by Draxa. Be sure to drop by his profile and leave him a thumbs-up (link at the end of the guide).
![]()
- Raven RVN-3L
- XL Engine 295
- Maximum armor (Ferro Fibrous)
![]()
- 2x Medium Laser
- 2x StreakSRM2 (2x ammo)
- TAG
- Guardian ECM
![]()
- If you try to hit an enemy with enabled ECM do not automatically switch your ECM to counter mode. This will make you vulnerable to other missiles. Instead, try to use your TAG. When someone else fires missiles at your target you will also get bonus xp+cbills.
- Never run straight at enemies. If you realise incoming fire quickly and instantly change the lane and move to the left or right.
Get Connected!
If you know of an excellent build, resource, or guide, submit it and maybe it will be featured on mwo-builds.net and seen by thousands of players. You can submit builds by sending us an e-mail, post it in the official looking-for-builds thread, or send us a private message via the official forums. You can also submit guides and builds via Facebook or Twitter (see below). Join hundreds of other Mechwarrior enthusiasts and like us on Facebook and follow us on Twitter. Receive the latest guides and the best MWO builds directly to your favourite social platform!| Follow @mwobuildsnet |
Read More
With the Pretty Baby a powerful Awesome variant enters the battlefield. Those of you who can bring the required money to the table will be rewarded with an excellent Assault Mech which can outplay any opponent using its strong armament and the outrageous xl engine 400! This guide was kindly provided by BertyBargo via the official forums. Be sure to drop by his profile and leave him a thumbs-up (link at the end of the guide).
![]()
- Awesome – Pretty Baby (Hero Mech)
- XL Engine 400
- Max armor on all parts
![]()
- 3x SRM6 (4x ammo)
- 3x Medium Pulse Laser
![]()
- Your torso twists very fast and very wide. Turn your torso sidewards when charging enemies. Your broad front is an easy target but when moving at high speeds and turning 90 degrees sideways you are almost unhittable. In addition the parts that will be hit this way have more armor and shield your XL engine. It is literally possible to Matrix dodge incoming projectiles.
- As with all relatively fast Mechs: Try not to be the first on the frontline. It is very tempting to rush headlong into your death. Move at slower speeds at the beginning of the match or even better, try to circle around the enemies.
- Try to distribute incoming damage. You can easily twist your torso to show more intact parts to your enemy, even your back is a valid option if your center torso is critical upfront.
- This is an assault Mech but you can very effectively run away with it. You will live longer, can come back and increase your match score greatly by living to die another day.
A similar build can be used without buying the hero variant using a AWS-9M. You can check out the smaller build by clicking here.









Get Connected!