
Category Ballistic Weapons (ACs, Gauss, …)
Excellent Shadowhawk 2D2 Brawler Guide
![]()
It is now widely accepted (but not proven) that the Shadowhawk is the most versatile and viable of all the Project Phoenix Mechs. This build is another extremely good argument why this claims are probably true. A Shadowhawk 2D2 equipped with all the 270m range goodness (AC/20, Medium Lasers, StreakSRM2) will make you a fearsome brawler. Speed, firepower, agility, and armor are very nicely balanced making this an absolute bad boy on the battlefield. Smegmw from HBA is one of the first to come up with this build and many have copied it since. I have started to use it myself, and although I am a sh1tty Medium pilot, I melt faces with this thing, doing 400-600 damage without any basic upgrades. If you have ordered a Project Phoenix package which includes the Shadowhawk, I definitely recommend checking this build out. It is also very cheap to build c-bill wise.
The armor distribution on the Smurfy link is close to optimal. Depending on your play style you might want to shift a few armor points from the legs to the arms. However, this won’t probably make too much of a difference. Also note that this build is very cheap c-bill wise. Assuming you have none of the parts you will only need 4.6M c-bills. You might want to add Artemis, as well, in order to improve StreakSRM2 lock-on times.
- Use your arms to absorb incoming fire if you can’t hide fast enough. If you lose one of your Medium Lasers, you are still more than fine.
- Your main damage is coming from your AC/20. Make sure every hit counts and avoid firing it over great distances. Shoulders aka side torsos of your enemies are prime targets.
- If you are running high on heat, stop firing your StreakSRM2s. If you are still on high heat, stop firing your Medium Lasers, as well. Focus solely on placing a couple good AC/20 hits.
- Do not fire while turning with your keyboard. Instead, adjust your Mech first, then use your mouse to place precise shots.
- Use your jump jets! They are not only for easier cliff climbing or poptarting. When engaging enemies, use them to look over small ledges and other obstacles which block your line of fire. You will most certainly get a couple of hits in before you are even there.
- Always soften your falls with Jump Jets in order to avoid unneccessary damage to your legs. Some of your most important components are in your legs.
Get Connected!
If you know of an excellent build, resource, or guide, submit it and maybe it will be featured on mwo-builds.net and seen by thousands of players. You can submit builds by sending us an e-mail, post it in the official looking-for-builds thread, or send us a private message via the official forums. You can also submit guides and builds via Facebook or Twitter (see below). Join hundreds of other Mechwarrior enthusiasts and like us on Facebook and follow us on Twitter. Receive the latest guides and the best MWO builds directly to your favourite social platform!| Follow @mwobuildsnet |
Read More
Shadowhawk 2H (Project Phoenix Hero Mech) Juggernaut/Brawler Build
![]()
It seems that, in terms of actual combat effectiveness, the Shadowhawk is pulling ahead of the other Project Phoenix Mechs. This might change over time, as more and more builds are being figured out. However, at the moment Shadowhawks are destroying PUG matches on a regular basis. The Shadowhawk is the Project Phoenix’s Medium Mech weighing 55 tons. It has multiple hardpoints for every weapon type making it a very versatile Mech. Add Jump Jets to the mix, and you got a deadly and agile ninja, pacing around the battlefield, dishing out sick damage numbers. The damage is usually so high that a skilled Shadowhawk pilot with the right build must not fear a comparison with other Heavy and Assault pilots! This post will provide you with a rough outline of an allrounder build for the Shadowhawk 2H, the Project Phoenix Hero Mech variant.
Pay close attention to the armor distribution and emulate it to the point. Once you have some experience with the build you might want to adjust a couple points to your liking, but this allocation is already very polished and prooved its worthiness in a lot of battles. If you don’t have the engine lying around, you can also make this build work using an XL-300 (drop one UltraAC/5 ammo and increase armor on legs and left arm).
![]()
- Use your right arm as a shield. If you have incoming damage (especially ballistics or missiles of any kind), turn your upper torso quickly. Your shield arm has no armor on it, but it will still reduce the incoming damage greatly.
- At the beginning of matches and during long range stand-offs, use your UltraAC/5 to harass over great distances. It will wear down your opponent and, more importantly, scare him into cover.
- Your ER Large Laser should be constantly firing. Whenever you see a target popping up somewhere: shoot it! This will amount to high damage numbers at the end of the round and is very easy to do.
- The ammo distribution in this load-out puts a clear emphasis on extended use of the UltraAC/5. If you find yourself running out of StreakSRM2 ammo multiple times, exchange one ton of ballistics ammo for a second ton of StreakSRM2 ammo.
- This build is not considered to be an effective brawler. If you are entangled in close quarter fights, move a bit further away. Do not stop, do not engage. Keep firing your ER Large Laser and StreakSRM2s and get the hell out. You can dish out insane amounts of damage, but you can not take a lot.
- Weapon grouping advice: 1) UltraAC/5 2) ER Large Laser 3) Both StreakSRM2s 4) All weapons (optional)
- For modules use any combination of the following (in order of usefulness for random public games): Adv Seismic Sensor, Adv Sensor Range, Cool Shot 9 by 9, Faster Target Info Gathering, Artillery Strike.
Get Connected!
If you know of an excellent build, resource, or guide, submit it and maybe it will be featured on mwo-builds.net and seen by thousands of players. You can submit builds by sending us an e-mail, post it in the official looking-for-builds thread, or send us a private message via the official forums. You can also submit guides and builds via Facebook or Twitter (see below). Join hundreds of other Mechwarrior enthusiasts and like us on Facebook and follow us on Twitter. Receive the latest guides and the best MWO builds directly to your favourite social platform!| Follow @mwobuildsnet |
Read More
Battlemaster 1G (Phoenix Hero Variant) Pubstomper Guide
![]()
Project Phoenix has arrived, and people have already come up with decent builds for Shadowhawks and Locusts. However, good Battlemaster builds are much harder to come by. The build presented here is a big mile stone in the development of the Battlemaster. It has everything you need: Long range high pinpoint damage, close quarter punch, and above average survivability. Two AC/5s and a single PPC provide excellent sniping and fire support capabilities. Six (6!) Medium Lasers allow you to dish out insane damage at close range. You can also continue to fire your double AC/5s while brawling. Finally, the Battlemaster is an Assault Mech and this build utilises a standard engine making it very durable. Let’s take a look at the build.
There are a few minor adjustments possible, depending on your preferred play style. For example, if you are more comfortable having all sniper weapons on your arms for increased precision, you can swap the PPC to your right arm and move the Medium Laser to the torso. While this is more comfortable, it is also less effective. Sniping around corners becomes more difficult and you will lose more important weapons when using your right arm as a shield arm. Addition of AMS is also possible, just remove any of the Medium Lasers, AC/5 ammo, or DHS to free up the tonnage. However, do not remove armor from your head. The cockpit is really easy to hit at the moment and you need every point of armor on it.
![]()
- PPCs have a minimum range of 90ms. Do not fire them beyond that range ever. You will overheat and die miserably.
- In high heat situations stop firing your PPCs immediately. You will always do more damage, if you do not overheat and use your AC/5s exclusively.
- AC/5s reload much faster than PPCs. Try working in at least one additional AC/5s salvo in between PPC recycle times when engaged at longer ranges.
- Use your right arm as a shield. One of your most vulnerable spots is you center torso. Try to protect it at all times.
- The Battlermaster’s upper torso twisting angle is very crappy. Keep this in mind when crossing through open spaces. Try to back up against a wall when engaged in close quarters.
- If you are playing in an organised group it is highly recommended allocating almost every point of armor in the front. If you are playing random games without a group, 10-25 rear armor are probably the better choice.
- Weapon grouping advice: 1) PPC and both AC/5s 2) All Medium Lasers 3) Both AC/5s only
- For modules use Cool Shot 9 by 9, Advanced Sensor Range, and Advanced Seismic Sensor. You can play around with the Advanced Zoom Module in exchange for the Advanced Seismic Sensor.
Get Connected!
If you know of an excellent build, resource, or guide, submit it and maybe it will be featured on mwo-builds.net and seen by thousands of players. You can submit builds by sending us an e-mail, post it in the official looking-for-builds thread, or send us a private message via the official forums. You can also submit guides and builds via Facebook or Twitter (see below). Join hundreds of other Mechwarrior enthusiasts and like us on Facebook and follow us on Twitter. Receive the latest guides and the best MWO builds directly to your favourite social platform!| Follow @mwobuildsnet |
Read More
Viable Highlander 733C Load-Outs for 12 vs 12
![]()
Did you ever wonder what some of THE most used builds in high-level 12 vs 12 look like? Well, wonder no more as this guide will show you some of the semi-secret builds that pro-level players are using everyday. This guide in particular will focus on the Highlander 733C. It’s hardpoint layout and high tonnage allows it to bring highly targeted damage to the frontlines while still remaining surprisingly agile for an Assault Mech. With the old PPC-Gauss-Sniper builds gone, the attention has shifted to other ballistic weapons, namely the AC/10, AC/5, and AC/20. This Highlander Competetive Guide will showcase three different versions of a Highlander 733C sniper build which is used by the best of the best.
The first version is probably the most easy to use. If you are new to the Highlander chassis and jump-sniping (aka “pop tarting) in particular, I highly recommend this build. It is very effective even if you are not jump-sniping. A standard engine and AMS provide excellent durability.
The second version is basically the deluxe version of the first one. You will have more armor, higher movement speed, and enough heat dissipation to fire an additional alpha strike. However, you are also slightly more vulnerable since your Mech uses an XL-engine. This build is lethal in the hands of an experienced pilot.
Lastly, you can switch out the AC/20 for double AC/5s. Your firepower and pinpoint damage will be reduced, but your overall damage increases. The build is slightly more heat efficient and is more effective over long ranges. If you can work in a second alpha with only the AC/5s inbetween regular full alpha strikes, you will demolish every enemy.
![]()
- PPCs have a minimum range of 90ms. Do NOT fire them beyond that range ever. You will overheat and die miserably in close quarter fights.
- All your weapons are on the right side of your Mech. Whenever you can not return fire, twist your upper torso to protect these weapons and absorb the damage with your unimportant arm.
- Use your jump-jets to peak over rocks, buildings, and ledges. Try to release an alpha strike on your way down.
- If you are playing in an organised group it is highly recommended allocating almost every point of armor in the front. If you are playing random games without a group, 15-25 rear armor are highly recommended as well you can try online casino games at clickspark.it you can find very important info about this last ones.
- Weapon grouping advice: 1) All weapons 2) PPCs only 3) AC(s) only
- For modules use Cool Shot 9 by 9, Advanced Sensor Range, and Advanced Seismic Sensor. If you are running the 3rd version (with 2x AC/5s) you can play around with the Advanced Zoom Module in exchange for the Advanced Seismic Sensor.
Get Connected!
If you know of an excellent build, resource, or guide, submit it and maybe it will be featured on mwo-builds.net and seen by thousands of players. You can submit builds by sending us an e-mail, post it in the official looking-for-builds thread, or send us a private message via the official forums. You can also submit guides and builds via Facebook or Twitter (see below). Join hundreds of other Mechwarrior enthusiasts and like us on Facebook and follow us on Twitter. Receive the latest guides and the best MWO builds directly to your favourite social platform!| Follow @mwobuildsnet |
Read More
UltraAC/5 No-Jam Macro Tool Guide for Mechwarrior Online
Of all the weapons in Mechwarrior Online, only the UltraAC/5 have the unique mechanic of random jamming. Whenever you hold down the firing button or double click, the UAC/5 will release two shots resulting in double damage bursts. However, with a 20% chance, it will jam, rendering the weapon useless for 5 seconds.
Holding down the button (aka allowing double-shots and jamming) is actually a decrease in average damage per second (about 25% lower). But (very big but) if you are only fighting for less than 5 seconds, the potential burst and DPS is much higher.
Another advantage, besides increased sustained damage per second, is ammo conservation and reliability. Both excellent things to have on a weapon whose ammo is very heavy and has a random built-in jamming mechanic. The Ultra AC/5 is now much closer to the AC/5 in almost every respect. The additional ton and slot just buy you the ability to potentially burst. Especially your first shot becomes more powerful. This is useful for sniping, but the difference between the two weapons is not as big as it used to be.
If you don’t want your UltraAC/5s to jam, you have to restrain your trigger finger and only click precisely every 1.5 seconds. With a little practice, this is possible. However, there are also macros and tools which can help you with that. The remainder of this guide will show you where to get such a macro and how to set it up.
Macro Tool Installation and Setup
For this UltraAC/5 jamming macro guide we’ll be using ADHD – Fire Control by Clive (pilot name: evilC). It is a small tool which is already partially preconfigured for Mechwarrior Online. Check out his official page here and drop him a like. After all, he is providing free software for you. The tool is not that hard to set up, but if you are lazy or can’t get it to work, check out these few simple steps to get it all working.
1) Download the tool
Download the tool from his official site (direct link).
2) Unpack the zip file to a folder
Move it somewhere on your hard drive and create a desktop shortcut (right-click on the .exe-file and select Send to Desktop).
3) Start the program
Confirm any dialogues.
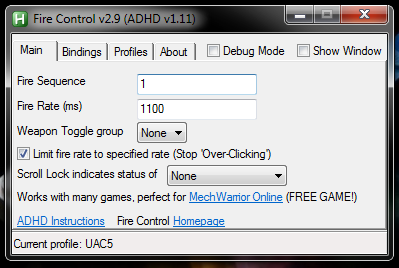
4) On the main-tab set the options as indicated in the screenshot
- Enter the weapon group containing all of your UltraAC/5s under Fire Sequence.
- Enter Fire Rate: 1500. If you have unlocked the Fast Fire efficiency, experiment with values around 1350.
- Side notes: You may need to add 4-5 to these values to account for lag. Keep in mind that the efficiency does not work while running Testing Grounds!
- Tick Limit Fire Rate.
- Ensure Weapon Toggle is set to None.
5) Set up bindings on the bindings-tab
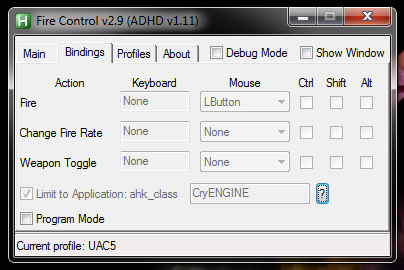
- Tick Program Mode to be able to change settings.
- I would recommend setting all you UltraAC/5s to weapon group 1 in-game and then setting the Fire action to left mouse button (LButton).
- Ensure that Limit to Application is enabled and set to CryENGINE. This way, this tool will only work while Mechwarrior Online is running.
- Important: Untick Program Mode once you are done.
6) Own face!
If you have done everything right, you should be able to hold-down your mouse button and fire all your Ultra/AC5s without them ever jamming. You must have the tool running in order to work. Be careful if you are changing to a Mech which has something different set to its first weapon group. You might have to close the program (or set up an empty profile in Fire Control) to not mess with your ability to fire properly.
With Fire Control running, you can still click again to trigger the double-shot. If you are simply holding down the button, the macro tool will ensure that your weapons will not jam.
Credits
This tool was made by Clive aka evilC. If you like what you see here, go check out his official page and official forums thread and drop him a like or comment. The tool is free to use for every pilot, however, if you want to make a donation you can do so on his project page (side note: I do not know evilC personally and I don’t get any money from him).
Fire Control can handle many more things and has a lot more features which are not covered here. This guide is just meant to provide a quick-start into single-firing UltraAC/5s without any extra stuff messing up the guide. Check the project’s page or the official forums thread for more information on how to setup a TAG toggle button, work with chain-fire groups, change fire rate with the press of a button, and many more.
Get Connected!
If you know of an excellent build, resource, or guide, submit it and maybe it will be featured on mwo-builds.net and seen by thousands of players. You can submit builds by sending us an e-mail, post it in the official looking-for-builds thread, or send us a private message via the official forums. You can also submit guides and builds via Facebook or Twitter (see below). Join hundreds of other Mechwarrior enthusiasts and like us on Facebook and follow us on Twitter. Receive the latest guides and the best MWO builds directly to your favourite social platform!| Follow @mwobuildsnet |
Read More
Ilya Muromets (Cataphract Hero Mech) 3x UAC5 Guide
![]()
With the recent buff to UltraAC5s, this build has become even more fearsome than it was before. An Ilya Muromets armed with 3x UAC5s, and 2x Medium Laser is a beast. This Cataphract destroys Assault Mechs in seconds. You will have no trouble at all melting through the center torsos of your enemies, hence the nickname “Chainsaw”. The build is reasonably heat efficient and has enough ammo to pump out more than 1,000 damage per match. The only downside is your exposed front, carrying an XL-engine.
The first version of the build is the most offensive one. This is the maximum possible amount of ammo you can carry. Kaffeangst, myself, and other friends of mine are running this version to great success. 7 kills and 800 damage are no rare sight. However, this version of the Ilya Muromets Chainsaw build is not suited for absolute beginners. If you are new to the game or ballistic heavy builds, I do not recommend this version. You have to know what you are doing at all times and a reasonable level of teamwork, reflexes, and aiming is required.
If you would like to play this build in more of a support role or a newer player, use the following version. It trades some ammo for a larger engine and the addition of AMS. The increased movement speed and the Anti-Missile-System allow you to make more mistakes and support your team, even if you are not destroying Mechs fulltime. Use this build if you see yourself more like a 2nd line of fire guy which sticks behind the large team and assists as necessary.
![]()
- Cataphract plus XL-engine is problematic. If you are eating carefully aimed sniper shoots, LRMs, or high frontal damage, you are done for. Whenever you are being hit by anything mentioned here, get to cover. Do not return fire. Also do not make the mistake to peak around the same corner a few seconds later. You will die a quick but horrible death and be no good to your team, because all that sweet ammo is smoldering in your corpse.
- Since your weapons are firing from a very low point, you must expose yourself almost completely in order to fire properly. That being sad, you should always try to flank the enemy or fire at enemies who do not or can not return fire. The two Medium Lasers are mounted a bit higher, so when in doubt, use your lasers first.
- Weapon grouping advice: 1) All three UltraAC5s 2) Both Medium Lasers. In addition, you can create weapon groups for chain firing the UAC5s, only the arm-mounted ones, or a group for left and right UACs to fire around corners without wasting ammo.
- Ammo is precious and UltraAC5 ammo weighs a lot. Make every shoot count. If you are unsure whether or not you will hit the target, do not fire or use your lasers.
- UltraAC5s are excellent weapons to scare off enemies. However, you want to kill enemies. If you can flank or sneak up on an enemy, wait until you have a clear shoot and hold that trigger down. Early hits will waste ammo and your opponent has more time to react.
- Preferred control options are disabled arm-lock and holding down the weapon group which contains all three of your UltraAC5s. Only use the lasers on colder maps or if you are unsure you can hit properly.
If you are looking for a macro which prevents your UltraAC/5s from jamming, check out our guide on how to setup Fire Control.
![]()
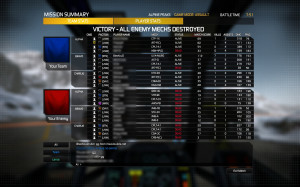
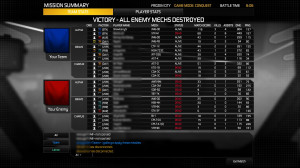
Here is a screenshot of what an average round can look like for you soon.
Get Connected!
If you know of an excellent build, resource, or guide, submit it and maybe it will be featured on mwo-builds.net and seen by thousands of players. You can submit builds by sending us an e-mail, post it in the official looking-for-builds thread, or send us a private message via the official forums. You can also submit guides and builds via Facebook or Twitter (see below). Join hundreds of other Mechwarrior enthusiasts and like us on Facebook and follow us on Twitter. Receive the latest guides and the best MWO builds directly to your favourite social platform!| Follow @mwobuildsnet |
Read More
Jagermech DD Ballistic Build with ACs and lots of Dakka!
![]()
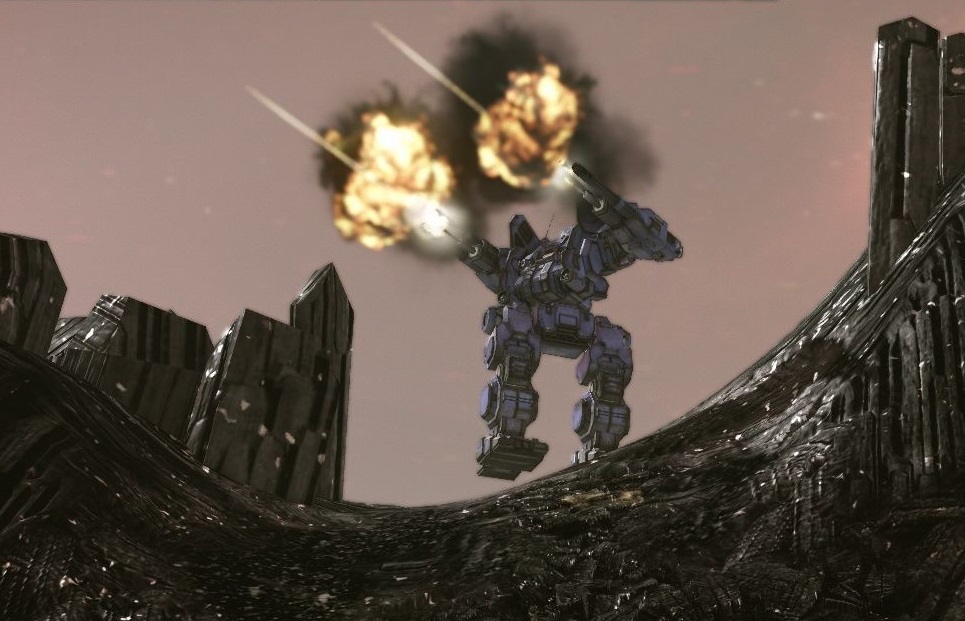
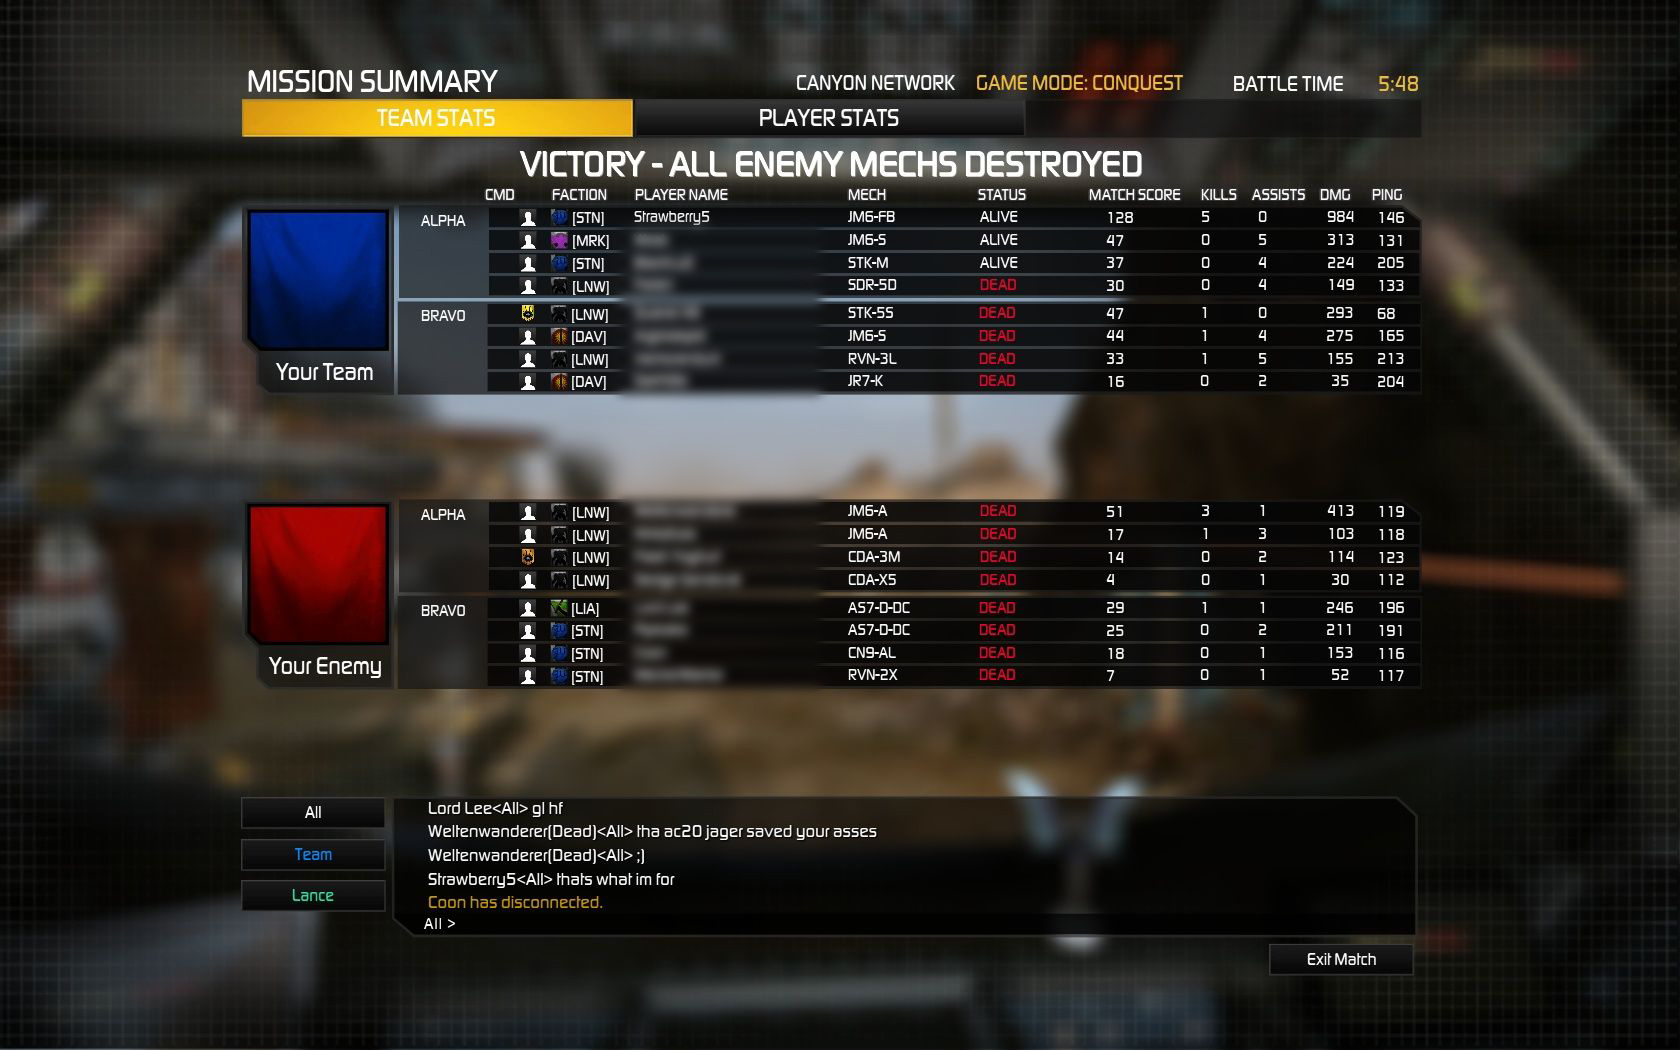
Jagermechs are revered and feared for their high amount of ballistic slots. This Jagermech DD build utilises all 6 (in words “six”) ballistic hardpoints. A guide that will blow your mind, enemies, and your headset to bits. The build is a lot of fun to play and still more than effective enough to destroy PUG games. The idea for this build comes from a good friend of mine, Strawberry5. He is a decent pilot, knows how to think out of the box, and pilots his Jagermechs (including a Firebrand) with great skill.

In order to accompany all the heavy ballistic weapons in this chassis, the armor has been reduced to the bare minimum. It is also recommended that you put a high emphasis on the front side torsos and only put minimalistic amounts of armor on your rear shoulders. Downsizing the engine is not recommended, since your Mech will already move very slowly.
![]()
- Use the Jagermech’s unique geometry to expose yourself as little as possible. The ballistic weapon hardpoints are mounted on a very high position. Try to get a feeling for how far you must expose your Mech in order to fire. Never go further out than necessary.
- Try to fight at range if possible. The double Machine Guns and Small Lasers increase your close range damage a lot. However, the low movement speed and minimalistic armor values will ensure a quick death if you are caught off guard by other more heavily armored brawlers with SRMs and the like.
- If you become entangled in a fire fight which you would probably lose, retreat immediately, but also try to keep firing while doing so. The screen shaking power of four ballistic weapons will make it impossible for the enemy to aim at your properly and many players will be scared by the special effects shrouding their screens.
- There are some other games that you can practice with your friends like for example Playing Backgammon that is very funny.
![]()
The build which forms the core of this guide was invented and provided by Strawberry5.
Get Connected!
If you know of an excellent build, resource, or guide, submit it and maybe it will be featured on mwo-builds.net and seen by thousands of players. You can submit builds by sending us an e-mail, post it in the official looking-for-builds thread, or send us a private message via the official forums. You can also submit guides and builds via Facebook or Twitter (see below). Join hundreds of other Mechwarrior enthusiasts and like us on Facebook and follow us on Twitter. Receive the latest guides and the best MWO builds directly to your favourite social platform!| Follow @mwobuildsnet |
Read More
Hunchback 4G/4H AC/20 Working Brawler Guide
![]()
The Hunchback is a very cool chassis. However, many people don’t like it (or struggle while playing), because the hunch, the Hunchback’s signature side torso is such a vulnerable part. The hunch usually holds most of the important weapons and will always be focused down by enemies. This Hunchback brawler guide will show you how to make your hunch less vulnerable enabling a skilled pilot to dish out unseen amounts of damage. The build is centered around an AC/20 and is complemented by lasers. The Hunchback brawler load-out is brought to you by Reslin and was posted in the mwo-builds.net looking-for-builds thread in the official forums. Reslin also wrote a more in-depth guide about several Hunchback variants. Check them out and give him a thumbs up.
![]()
Because it is one of the most crucial things about this Hunchback brawler build, I want to point it out first: Pay close attention to the armor allocation on the builds! The hunch has only 2 rear armor and everything else on the front side. Such a distribution will greatly increase your effectiveness on the battlefield. The hunch’s rear torso will almost never get hit, thus, most points of armor should be at the front.
A similar load-out can be done with the HBK-4H, as well. This particular version of the Hunchback brawler build utilises the additional energy slots in the hunch. If you don’t like the reduced range of the small lasers, just go with the 4G build above. However, the small lasers increase the maximum possible alpha strike slightly.
![]()
- Pay close attention to the armor allocation on the load-outs. If you are off by only a few points, it will greatly diminish your survivability on the battlefield.
- Always stay in motion. If you stand still or overheat, you are toast.
- If you are eating damage and can’t easily return fire, turn your upper torso to protect it and head for cover.
- Your AC/20 is your main weapon. Try to always hit perfect shots on cooldown. If you are unsure that you can place your shot, don’t shoot.
- Try to focus all lasers on the same component to incapacitate and down enemies fast.
- Weapon grouping hints for first load-out: 1) AC/20 2) All Lasers.
- Weapon grouping hints for second load-out: 1) AC/20 2) All Medium Lasers 3) All Lasers.
- Do not use arm-lock with this build. It might help newer players to optimise pinpoint damage, but you are wasting a lot of the Hunchbacks’s excellent agility and run-by abilities.
The builds in this Hunchback guide were kindly provided by Reslin. He also wrote a more in-depth guide about the Hunchback chassis. Check it out and drop him a like.
Get Connected!
If you know of an excellent build, resource, or guide, submit it and maybe it will be featured on mwo-builds.net and seen by thousands of players. You can submit builds by sending us an e-mail, post it in the official looking-for-builds thread, or send us a private message via the official forums. You can also submit guides and builds via Facebook or Twitter (see below). Join hundreds of other Mechwarrior enthusiasts and like us on Facebook and follow us on Twitter. Receive the latest guides and the best MWO builds directly to your favourite social platform!| Follow @mwobuildsnet |
Read More
Atlas RS/RS(C) Classic Brawler Mini-Guide
![]()
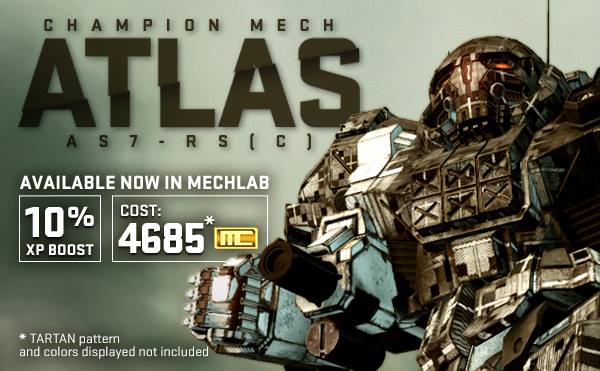
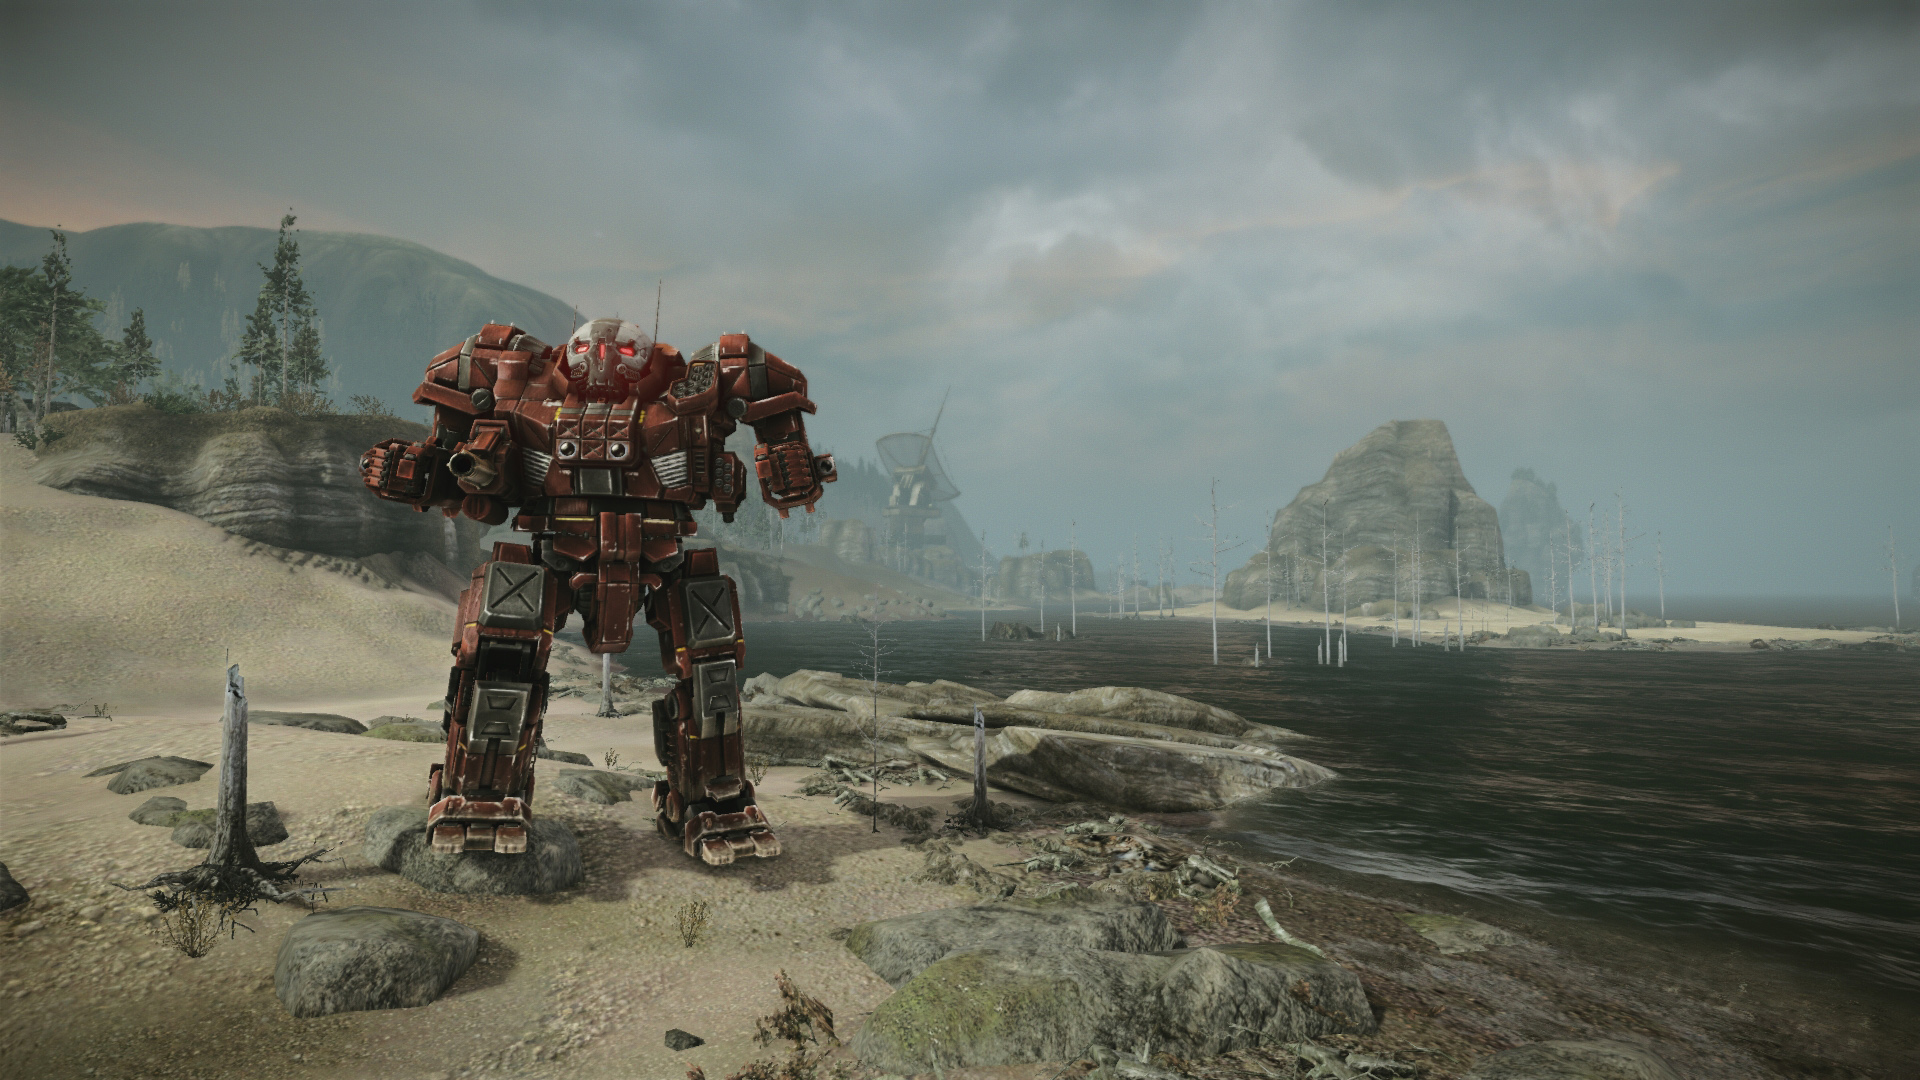
This is just a minimalistic guide to quickly present another guide which is based on a suggestion in the current MWO forum’s build guide thread. If you have an excellent build yourself, post it in there and we will have a look at it! We read through all guides and post the best ones here. This load-out was originally proposed by DiePrimateDie in said thread. It is an Atlas-RS-build with a heavy emphasis on close range damage. Since the AS7-RS and the AS7-RS(C) have the same hardpoints, you can use this load-out on both variants. An AC/20 and two SRM6s make you an excellent brawler. Add to this four Medium Lasers and enough ammo and heat sinks to fire all of this at a constant rate, you can deal a crap-ton of damage at 270m range. If it is within range, it is dead. You alpha strike will rip through enemy Assaults and Heavies in seconds.
This build works with the RS and the Champion Mech variant RS(C). If you prefer the D-DC, check out this similar Atlas D-DC brawler builds overview.
![]()
- This build is very heat efficient and carries a lot of ammo. Do not fear firing your weapons at all times. However, do not spam aimlessly. Especially the AC/20 hits should be targeted on critical parts of the enemy.
- If you encounter other heavy brawlers, focus fire their center torsos. Turn your upper body sideways, whenever you are not firing. You will be able to down an enemy Atlas without sustaining more than 20% armor.
- Move the larger chunk of your torso armor to the front parts. The stock distribution places too much emphasis on the rear. See the values in the Smurfy-link to get a rough idea of how these numbers should look like. Approximately 20 armor for the rear side torsos is enough. Center torso can even go as far as 100 upfront and 24 in the back.
- Weapon grouping advice: Weapon groups are completely up to you, but the following can serve as a field-proven starting point: 1) AC/20 2) All Medium Lasers 3) Both SRM6s 4) Alpha Strike aka all weapons you have (or bind alpha strike to a more accessible hotkey).
This build is based on a load-out proposed by DiePrimateDie in the official forums. Thanks again for that one.
Get Connected!
If you know of an excellent build, resource, or guide, submit it and maybe it will be featured on mwo-builds.net and seen by thousands of players. You can submit builds by sending us an e-mail, post it in the official looking-for-builds thread, or send us a private message via the official forums. You can also submit guides and builds via Facebook or Twitter (see below). Join hundreds of other Mechwarrior enthusiasts and like us on Facebook and follow us on Twitter. Receive the latest guides and the best MWO builds directly to your favourite social platform!| Follow @mwobuildsnet |
Read More
Ilya Muromets (Cataphract Hero Mech) Dual Gauss Sniper Build
![]()
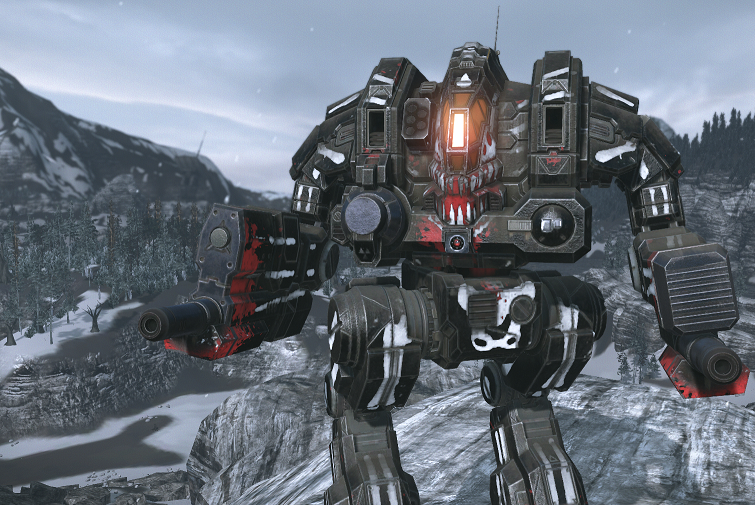
With the recent patch discouraging PPC and AC/20 boats, Cataphracts have been struggling to find new builds. If you are running you a 2X, you can build a brawler following this Cataphract 2X brawler guide. A more popular variant is the Ilya Muromets, the Hero Mech. A friend of mine at the Hell’s Black Aces Merc Corp showed me a build which has quickly become popular amongst competitive gamers. An Ilya Muromets build which is equipped with dual Gauss Rifles, Medium Lasers, and a Machine Gun. High alpha strikes, way above average dps and no heat issues what so ever make this Mech a fearsome opponent.
AMS + Machine Gun for critical hits and survivability
Higher movement speed version with AMS
Higher movement speed version without AMS but 3rd Medium Laser
![]()
- Cataphract plus XL-engine makes you very susceptible to frontal damage. If you come under heavy LRM, AC or PPC fire from the front, take cover immediately or you will die in seconds.
- Always use your Gauss Rifles together. The pinpoint damage will make short work of what ever component you are targeting.
- When at close range, keep those Medium Lasers and the Machine Gun fire buttons held down! It is almost impossible to overheat with this build.
- Your damage output is easily focused on one point, and the damage per second at close surpasses most other builds currently in the game. If you are entangled in a brawl, keep firing all the time. Your enemies will most likely underestimate your firepower and only turn around, when it is already to late.
This build was brought to my attention by Smeg of the Hell’s Black Aces Merc Corp. Check out their web page!
Get Connected!
If you know of an excellent build, resource, or guide, submit it and maybe it will be featured on mwo-builds.net and seen by thousands of players. You can submit builds by sending us an e-mail, post it in the official looking-for-builds thread, or send us a private message via the official forums. You can also submit guides and builds via Facebook or Twitter (see below). Join hundreds of other Mechwarrior enthusiasts and like us on Facebook and follow us on Twitter. Receive the latest guides and the best MWO builds directly to your favourite social platform!| Follow @mwobuildsnet |
Read More












Get Connected!